Showing posts with label handmade. Show all posts

Crochet Flower Banner

I haven’t crocheted in a while. I just kinda got burnt out on it and the price of yarn has gone up but I still have some scrap yarn and decided to make a wall hanging. At work, I do not have an office but I have a cube and I love it. I have it lightly decorated. Being a minimalist, It is pretty plain compared to everyone else's cubes. The way each person decorates tells a lot about that person. I do not like a lot of colors so mine is mostly grays and whites and a few plants in my window. 


The tassel banner you see in the center is something I made to add some boho style that I love. 

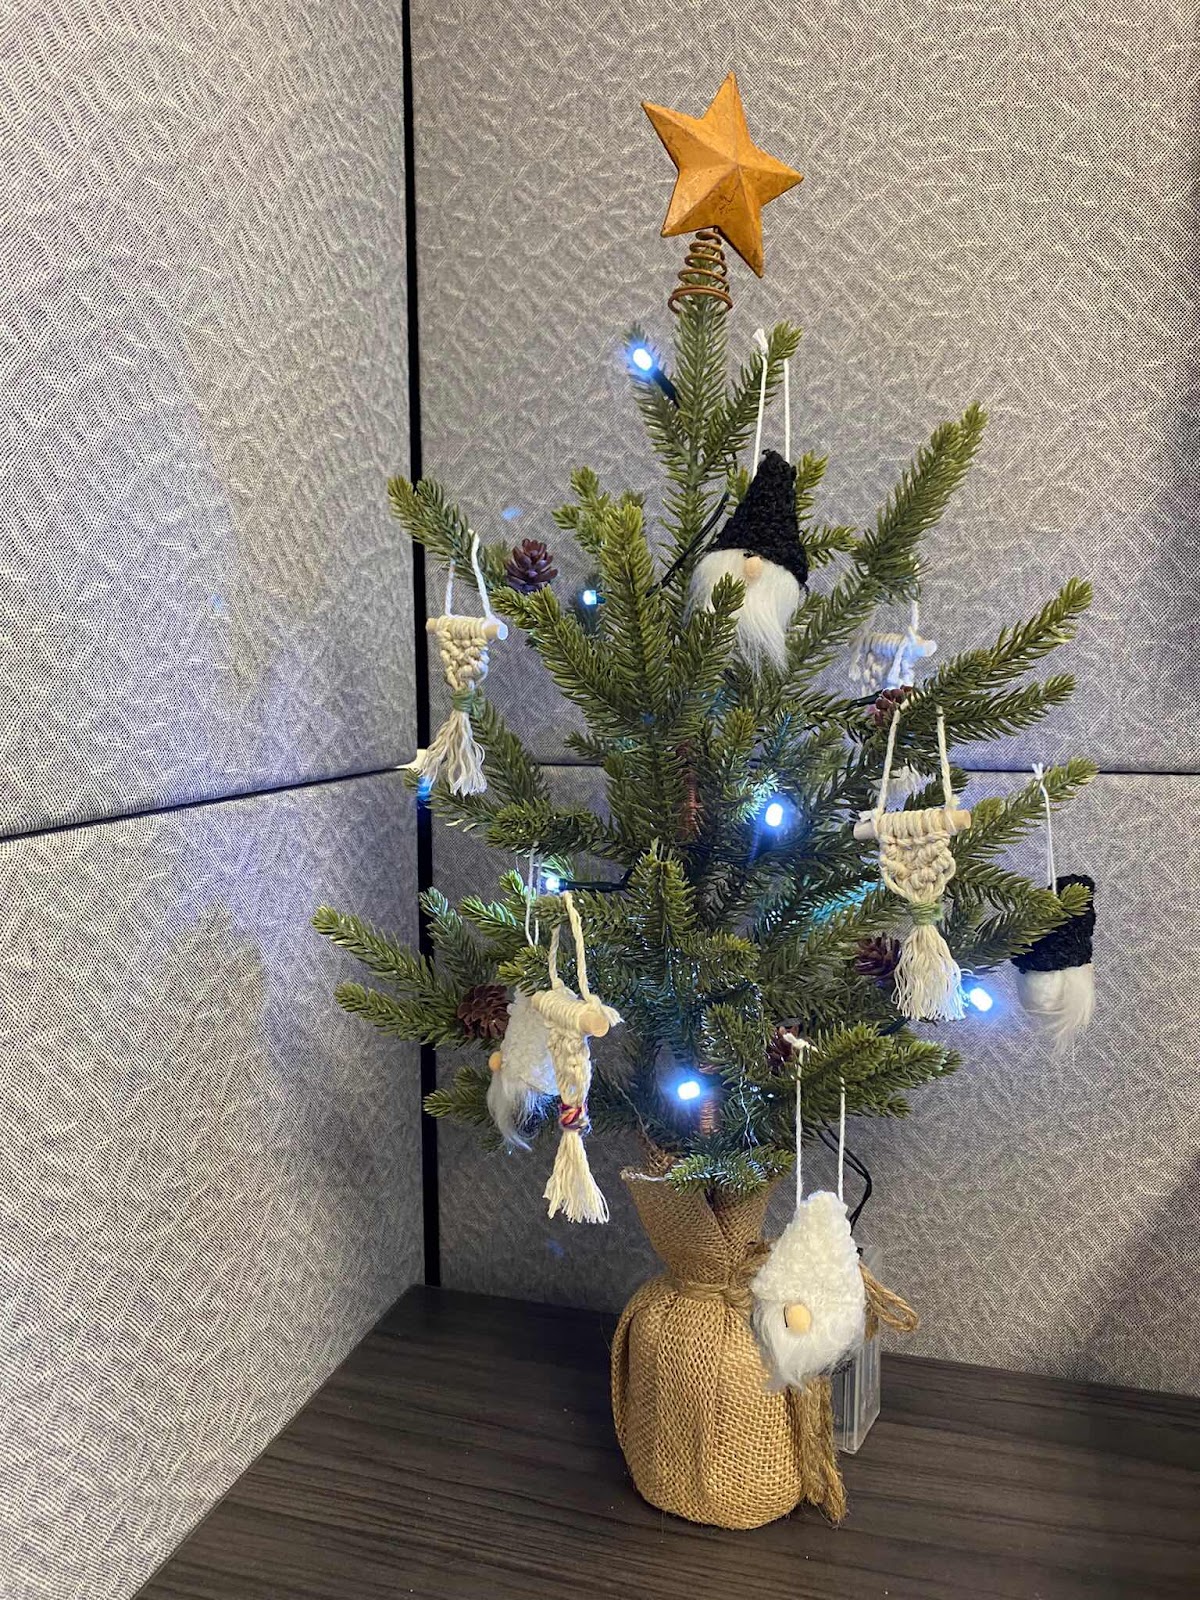
The outside of our cube has our name and an empty cloth wall. This is like a front door. People will often hang a little banner, flag or wreath to represent the seasons or holidays. I usually pick up something from the dollar store to hang on the outside.

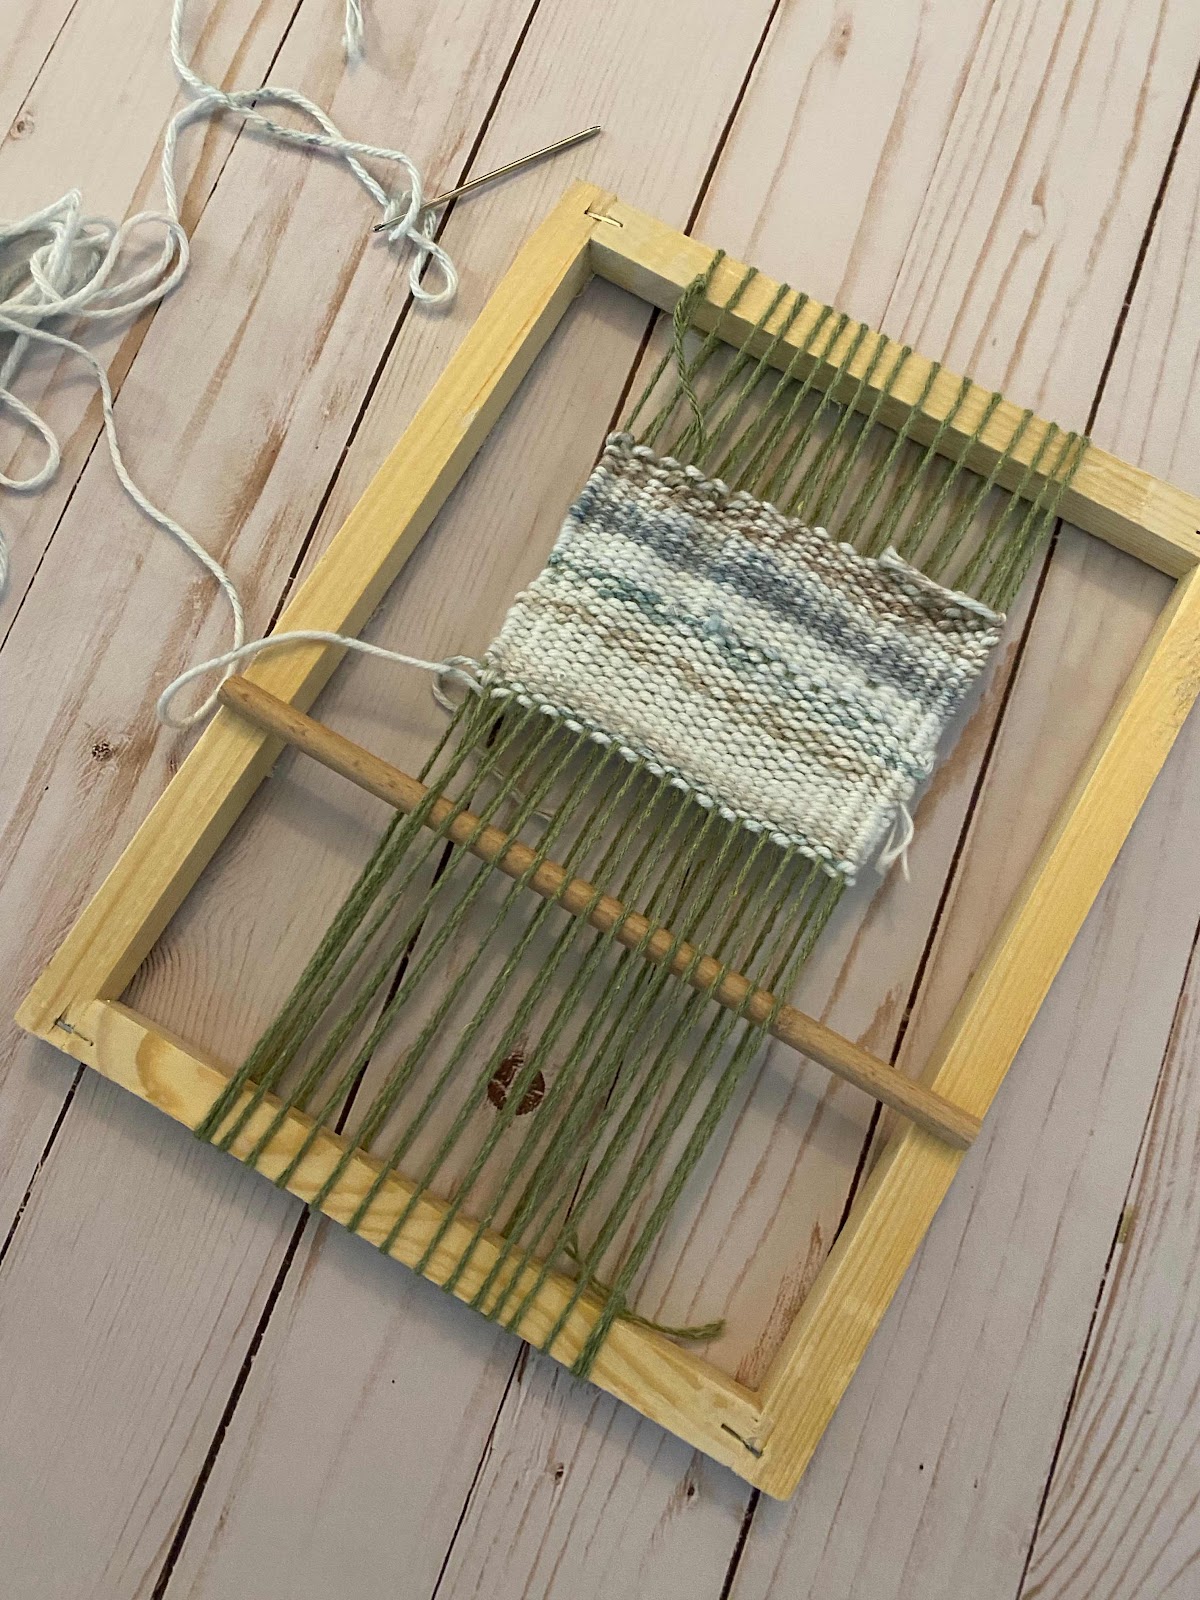
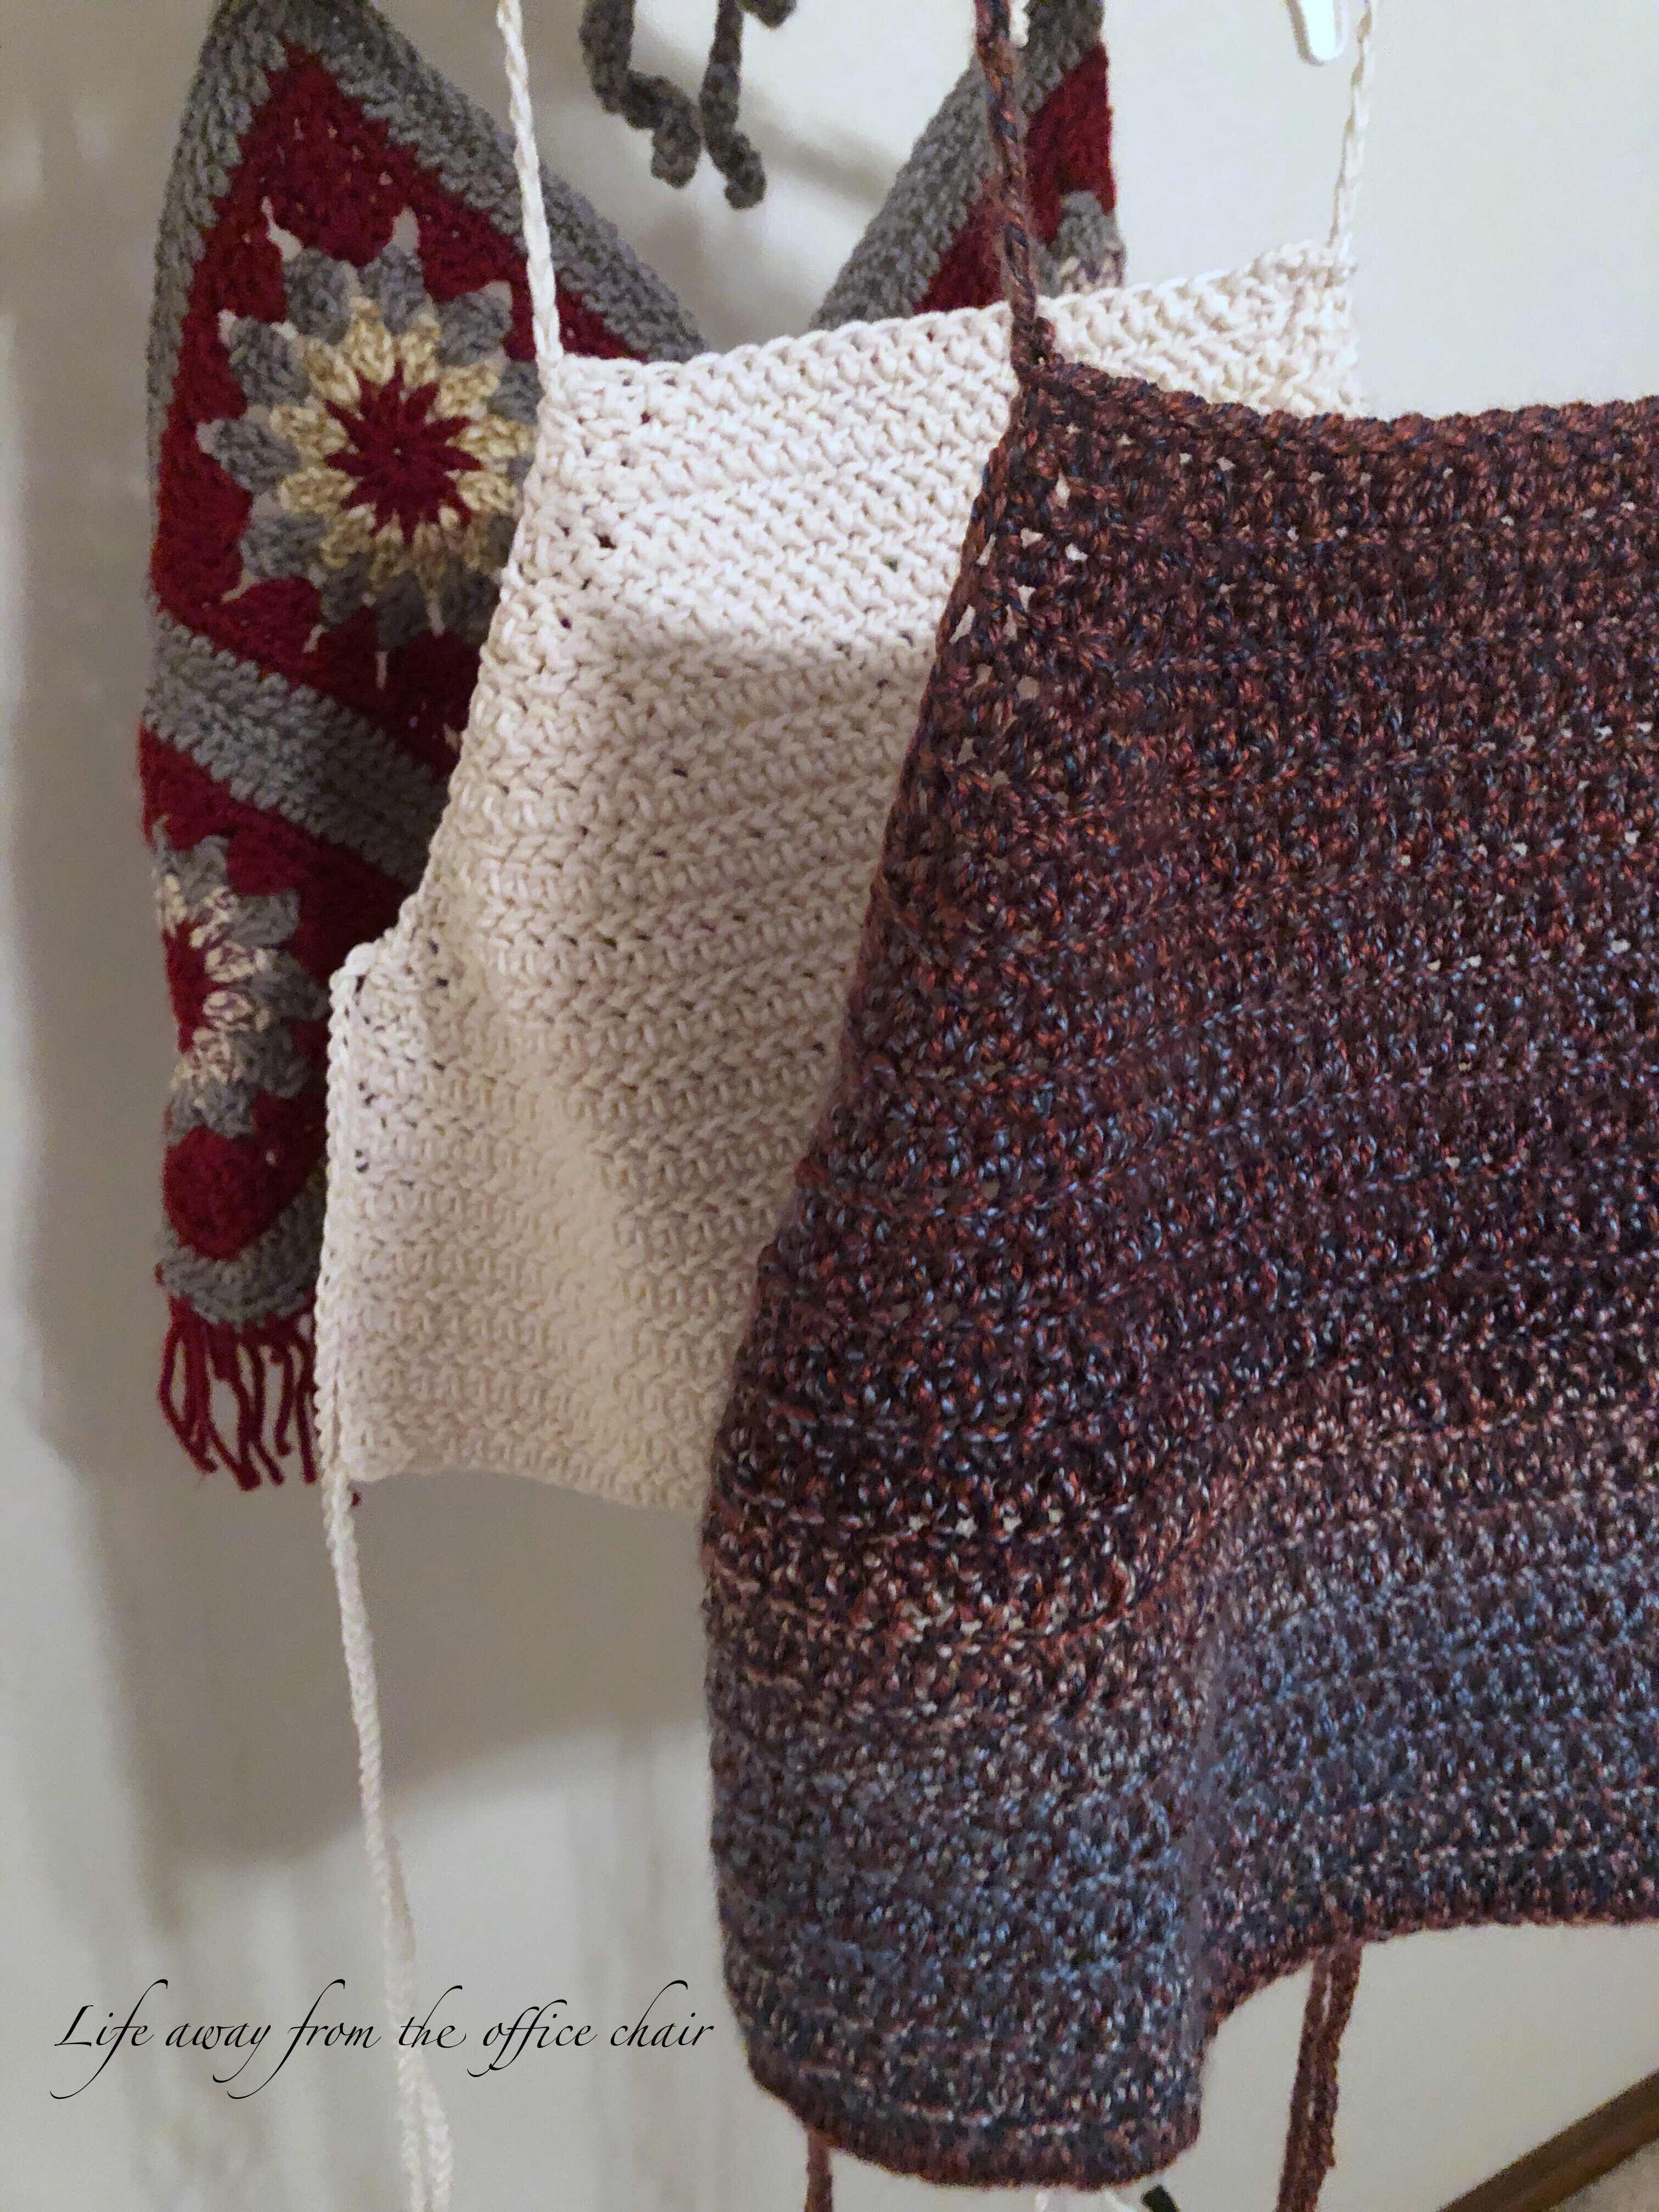
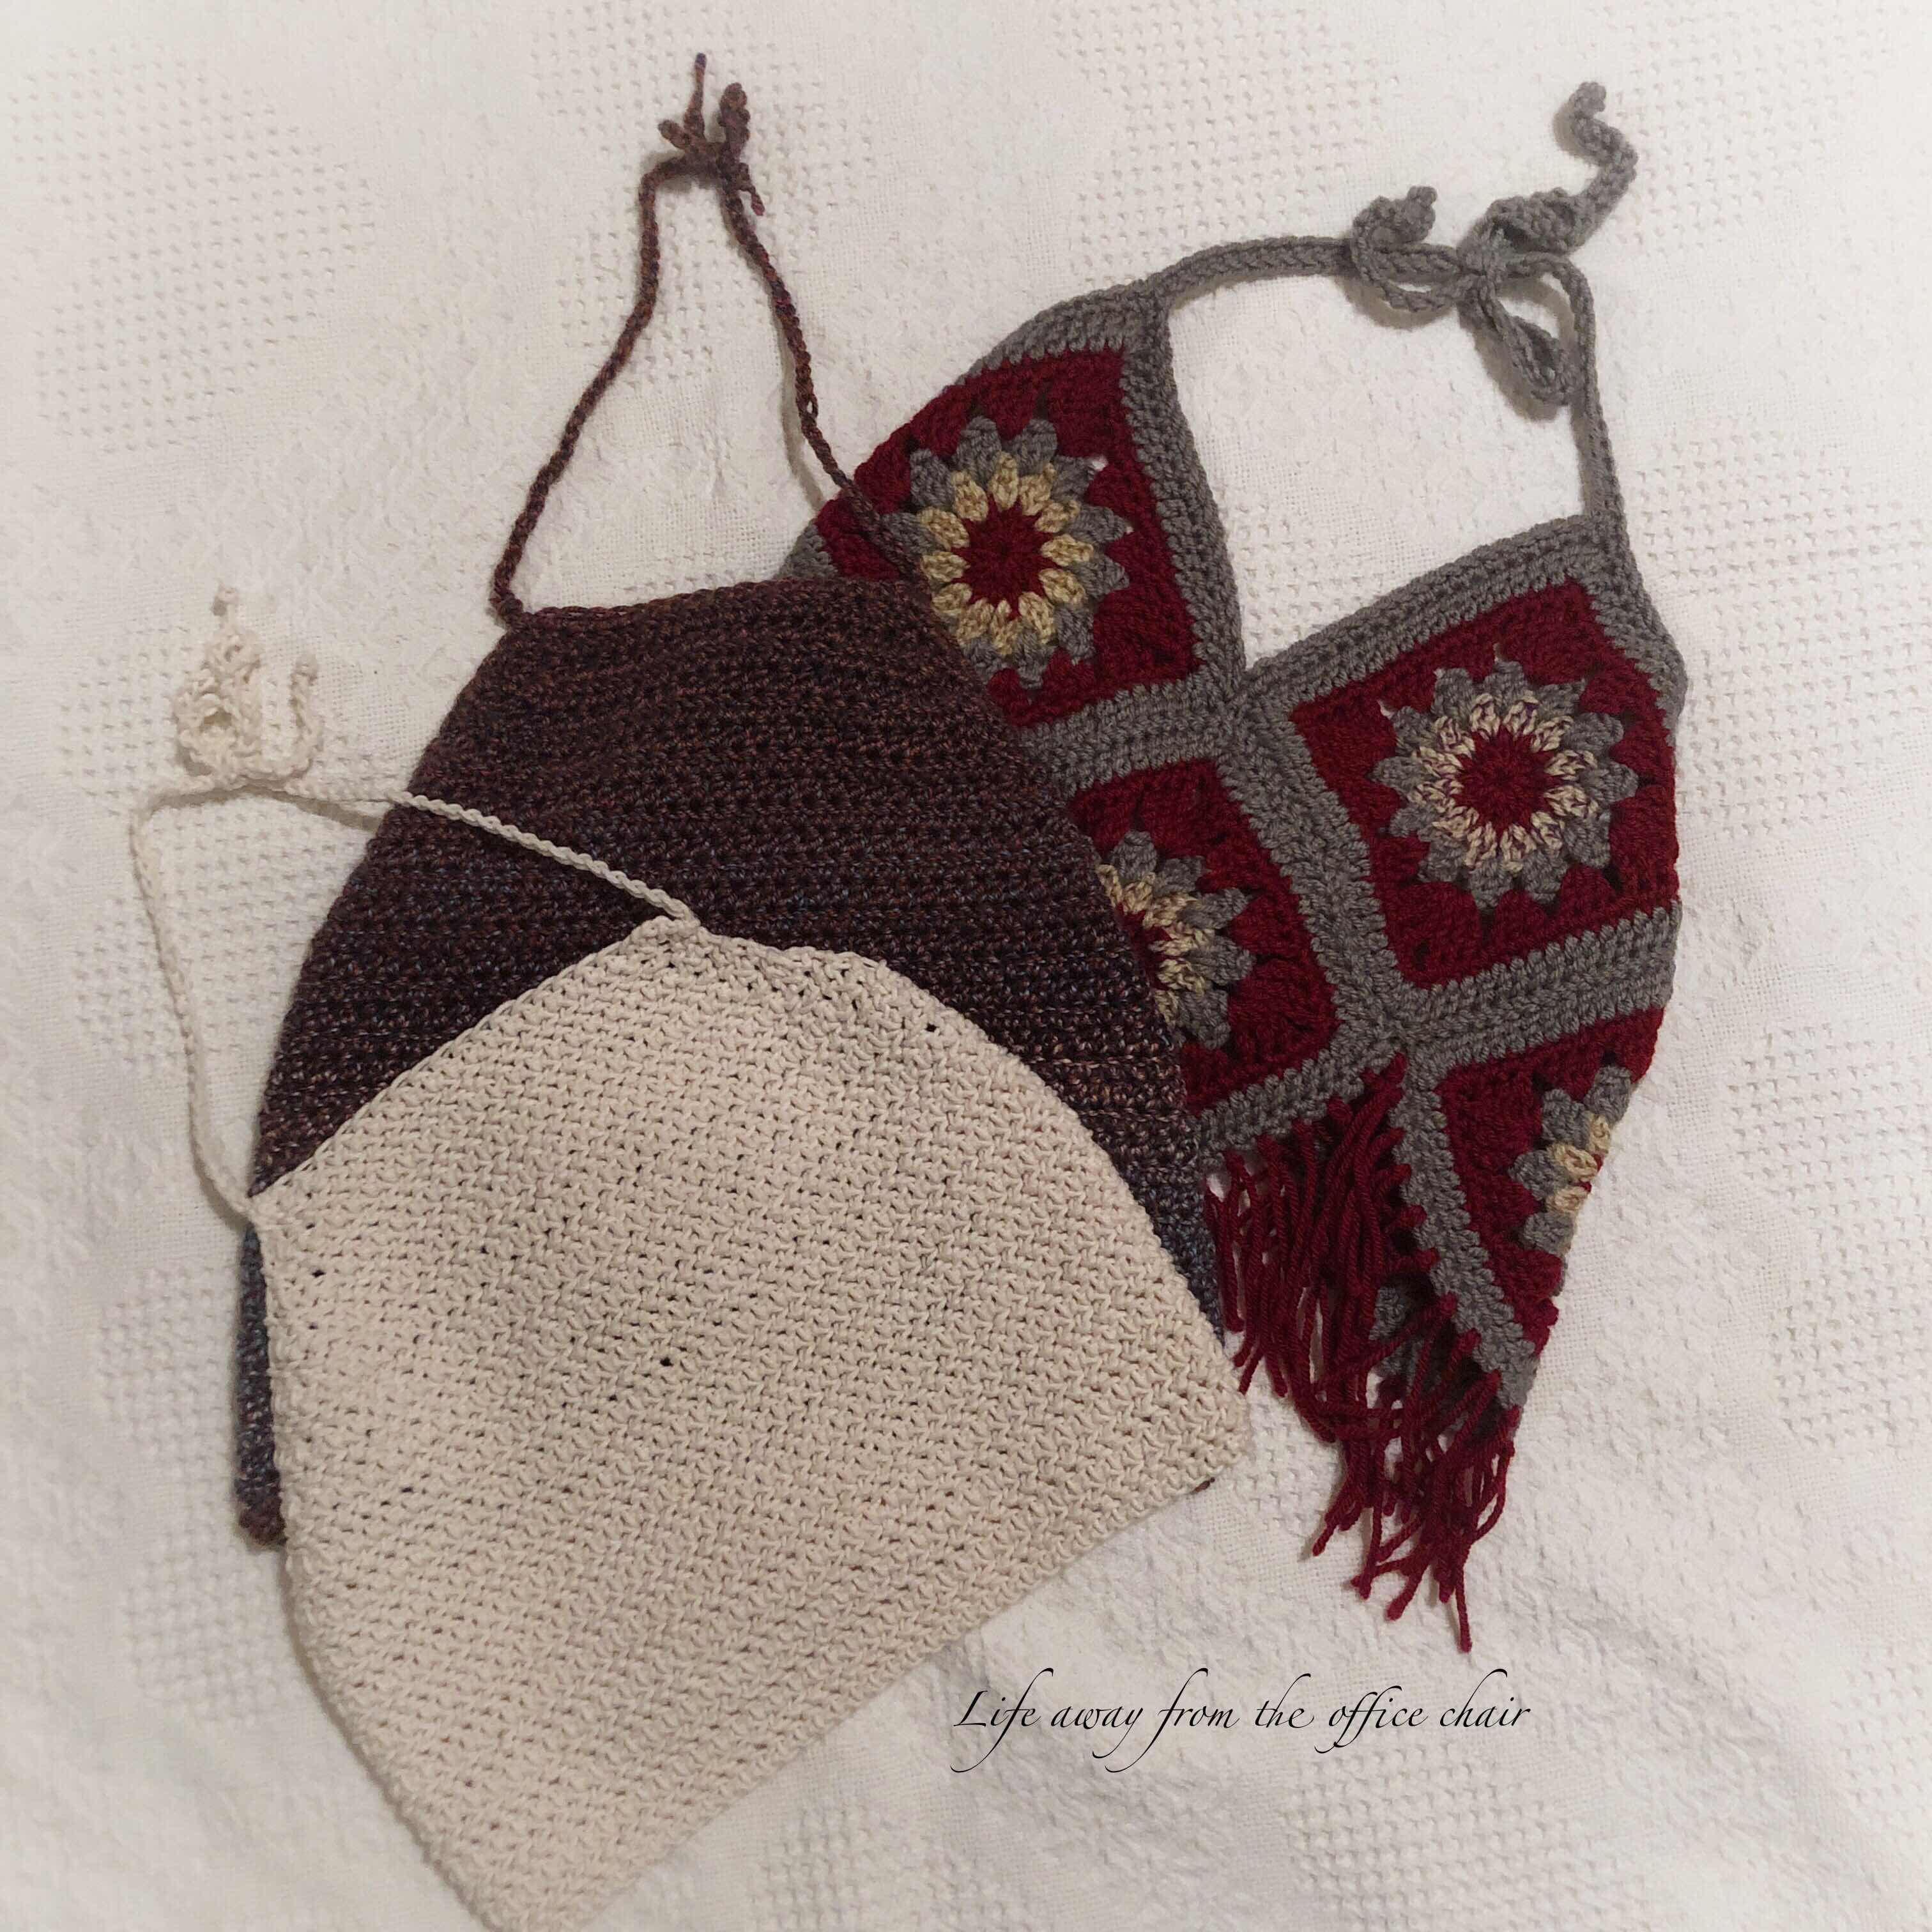
The holidays are over and I wanted to find something I could hang on the outside of my cube that would go through the summer, so I started digging into my yarn scraps and come up with the idea to make a wall hanging. I found a pattern for a flower and thought it would be perfect while also blending in with my boho style. 

NEVERMIND- GOOGLE HAS LOST MY PHOTO. This has happened on several of my post lately. I Cant”t seem to find a reason or a backup.


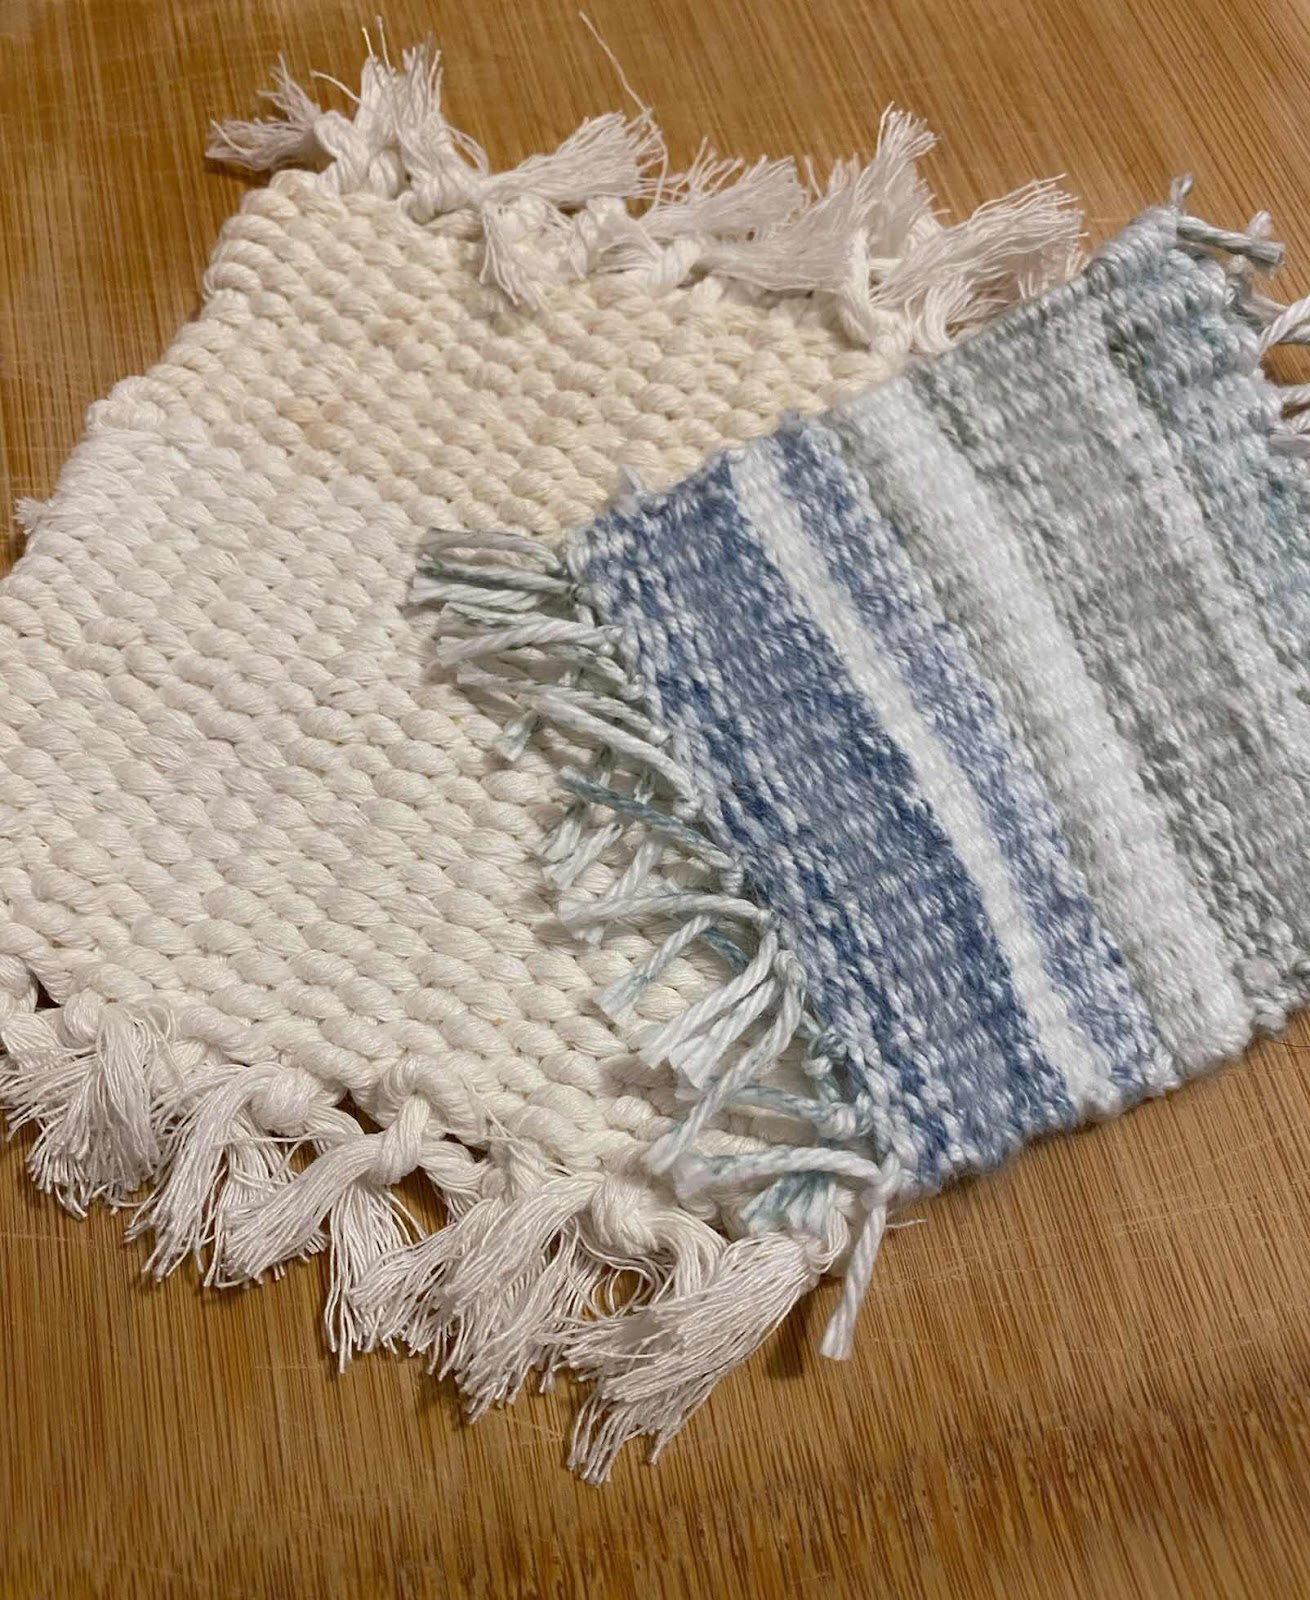
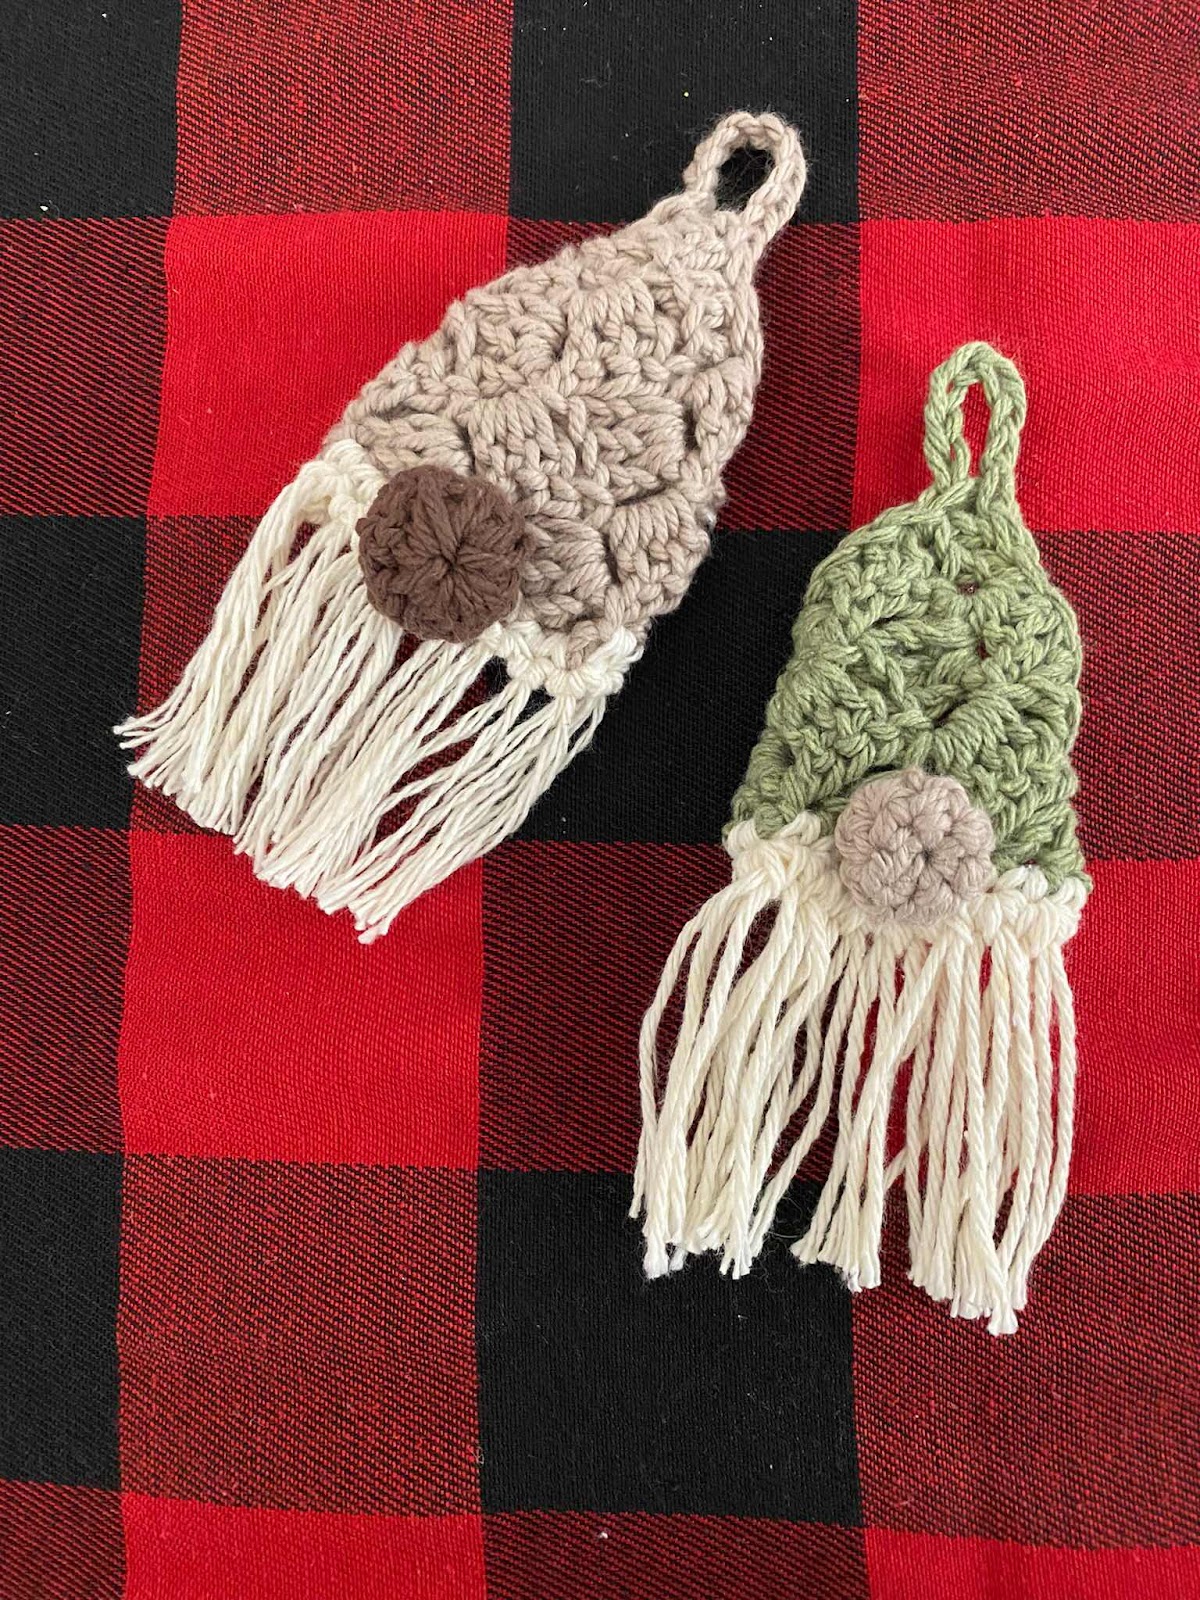
Green and white was the only colors I could find enough of to do this creation. I really like the way it turned out. I would show how it looks hanging on the outside of my cube but for work privacy reasons, I am not allowed. I think it looks good hanging there and I get a lot of compliments on it. 

This wall hanging was fun to make using the single stitch and only took a little about an hour and half to complete. 

Kites

As I was reading another blog post from a friend, It made me think about my childhood. Jack over on the ShipLog Blog wrote a post about homemade kites and how as a child he would fly kites made out of brown paper his dad would bring home from the dry cleaners. You can enjoy his post HERE.

This made me think about how I used to love it when momma would make us homemade kites. She would tell us to go find two straight sticks. This would get us out of her hair for a little while. We would run out into the woods and pick the perfect ones. Then we would bring the sticks into momma and she would make us a kite out of the daily news paper. If I can recall, she would use ribbon and bows for the tail. 


Sometimes they would fly and sometimes they wouldn’t but I would find an open area without any power lines or trees and take off running. The kite would often be bouncing on the ground behind me until a good wind would grab it and take it into the air. The open area I found was often just the dirt road in front of the house. Trees were all over but to an eight  year old, the space above my head was forever clear. 

The homemade kites never made it past a couple hours as either they would tear up from dragging the ground, fought over it with my sister and brothers or stuck in a tree. 

Now days I still like kites. I have a real store bought one at the beach that I keep in the camper just incase I want to fly it. It’s nothing fancy and its small but It’s fun to fly on the beach were It will reach sun. 


Handmade Hair Pins

I’m at it again. Playing with sticks. Whittling and carving. 

I have been intruiged with hair pins lately. Until a few months ago, I had no idea how women held their hair up with a hair pin. I mean, how is it possible that a single stick will hold a whole head of hair in a twisted updo? Well, obviously, easy. I was amazed when I gave it a try. I have been in favor of this type of hair pin ever since. 

Since Covid took half of my hair, I have had to be careful at how I put my hair up. I do not want to use anything that can be damaging. I stopped using stretchy bands and now only use hair pins or claw clips to keep from damaging the little bit of hair I have left. In case you missed it, you can read about my Covid hair loss HERE
After 3 months and losing 50% of my hair, It finally stopped falling out. Now it is in the regrowth phase. I use special shampoo and oil to help with the process. 

I got this fancy idea to make my own hair pins so I had my husband gather me a few sticks during his morning walk. He didn’t ask, He just knows when I gather little pieces of nature, I have a craft idea. 


I picked through them and found some that would be perfect. So the carving and sanding began.


Being a minimalist, I like to keep things simple. I do not like a lot color and I love things that come natural. Nature is full of things we can use in everyday life. I think I could seriously live in a tee pee, and eat berries for a living. Haha. 

After I carved the sticks to the size and shape I needed, I continued peeling away the bark to reveal the raw wood. Then I sanded them smooth and gave them a thin spray of clear coat. 


I gave one a burnt design with my wood burner. One has a silver painted tip and one I left alone because I thought it was just so darn cute with the “Y” shape at the top. Each one comes out different and has its own unique shape and color. 


I had to try them out and love how fun they are. (Girls, these can be used in self defense also) . They are approximately 6 inches long and made of Wonder wood (Wonder what kind it is). Haha. Seriously though, I think they are from an oak or maple tree. 

I plan to make some more and maybe even try to sell them. I’m just not sure this old fashion technique will ever be popular again. But who knows, there could be someone out there that would love to have a piece of nature to wear in their hair. 

What do you think?
Do you wear your hair up with hair pins?


Weaving

For years now, I have enjoyed working with yarns. I used to do a lot of crocheting and made a lot of things for my Etsy shop. I closed my shop last year. I did not want to price my items too high and it got to the point where the price of yarn went up and so did the selling fees. Rather than raising my prices, I just closed down. Now I just make things for friends on a whelm or when I have a baby shower to attend.

I like to always be doing something with my hands. I like to settle down after my evening shower and watch tv. I admit, If I am not doing something, I will go to sleep and miss the whole show. So I will usually pick up some fiber from my yarn basket and play around with crochet, macreme or weave.

Did you read that? I have been weaving now too. I was looking around on Pinterest and seen where you can weave with only a board or picture frame and a few feet of yarn or cord and thought I’d give it a try.

I found an old picture frame and began wrapping some cotton yarn in a figure eight motion. Then I threaded a needle and began to weave.
Below is my first try. Nothing came of this and I started over with a different yarn. 


On my second try, I created a couple mug rugs (aka coasters). 


They are a little wonky, but not bad for a beginner. I already use them. I always use a coaster. Not to protect my table but because I can not stand the sound of my cup hitting a hard surface. 
It was relaxing sitting in my recliner and weaving. When my eyes get heavy, I will put it down and work on it again the next day. 

I also made a couple weaved bracelets.


I have actually been wearing them to work and get lots of compliments. They are just my style. They are light weight, warm and comfy. 

Always stay tuned because you never now what else I will decide to create. 
That’s if I can keep my eyes open after a long days work. 


Handmade Christmas Ornaments

I have a little Christmas tree in my work cubicle and needed some ornaments for it. My cubicle theme is mostly boho so I wanted something that would fit in with that style. That’s when I seen this pattern for tiny boho macramé ornaments. I had to give it try. 


I love how they turned out and they fit my theme perfectly. They are now hanging on my little tree along with the little gnome ornaments I purchased from Walmart. 


I have not done any crochet lately. In fact, I even closed my Etsy store. Because I was tired of making things and they never sold or if they did sell it was mostly people asking for another color other than what I already had made. I was just getting tired of meeting demands. When it becomes work, It’s not fun anymore. I also have not sold enough this year to cover the fees. So I gave it up. 

The other night I decided to pick up the crochet hook and create a couple little gnome ornaments for my tree at home. I made two. 


They were very easy to make and you can find the pattern HERE

It’s fun to crochet small things. Theses ornaments were fun to make and only took about 30 minutes to complete each one. They do not really go with my colors but they still look oddly good on the tree.

Do you use a theme at Christmas?
My theme at home is buffalo plaids and touches of red throughout. 

Receiving Blanket Inspired Crochet

If you have seen pictures of new born babies or have had babies of your own then you have seen the most used receiving blankets in the USA. The famous blue and pink blankets are part of the Kuddle-Up line from the health care supply company called Medline. These flannel blankets are soft, warm and absorbent. This is the first fabric that touches the baby’s skin once it comes into this world. They are gender neutral so there is no arguments with boys wrapped in pink or girls wrapped in blue. They date back as far as the 1950’s.


I confess that the only thing I have ever stolen in my life was the receiving blanket my daughter was wrapped in and the little hospital tshirt and beanie she was required to wear during her stay. Now days parents can dress their babies in anything they want too on the first day of delivery. In the early 90’s, all I needed to pack for delivery was an outfit for her to wear home. It was a frilly light blue dress and silk booties. 

The other day I was in the mood to crochet another baby blanket to sell in my shop. I needed three skeins of yarn but I did not have three of the same colors. The only full skeins I had available were a blue, white and pink. Then the idea struck me to crochet a hospital receiving inspired blanket. I pulled out a note pad and wrote down how many rows and stitches I needed to work for each color to somewhat mimic the popular receiving blanket.   


Two nights and four tv programs later, I pulled it off. I think a baby will be cute wrapped up in this blanket as it exits the hospital just days after birth. This blanket is the perfect size for car seats, laps, and strollers. It may even become a child’s favorite cuddle blanket that will last for years.  


Feel free to visit my Etsy shop at LiLiDi or on the page tab at the top of my blog. 


Handmade Loofah Soap

I promised a post about the outcome of my Loofah harvest.
If you have been following my blog then you know I grew a small loofah garden this past summer. Loofah is a natural sponge. It grows on a vine and in the same family as the gourd. They grow large and dry out in the Fall. Once they skin is hard and dry, you peel it off to reveal a loofah sponge ready to remove seeds, rinse and use. 


My harvest was small. I had many loofahs appear but never reached maturity. I blame it mostly on the size of the trellis I had it to climb. They need a lot of space to spread. I was a little disappointed. I wanted to have an abundance of sponges to share, but it didn’t happen. 

I found a way to share the small harvest of loofahs with friends by cutting them into pieces and making them into soaps (not my friends, my loofahs). For Christmas I was able to give each neighbor a couple homemade loofah soaps and a set of my crochet washcloths as gifts. They also received homemade cookies. 


The process was easy. 
I first had to find a a silicon soap mold which I ordered off ebay. Then headed out to Hobby Lobby for some melt and pour soap. I chose the natural goat milk soap base. I have never made soap before. I could never accept the process of buying soap to make soap. It just doesn’t make since to me. 
But I did it anyway.


I placed a cut of loofah into the molds. Then I melted the soap and added a drop of fragrance. I used some soap fragrance but you can use essential oils just as well. I poured the melted soap over the loofah in the mold. I actually only filled the molds half way as I failed to get enough soap. I refused to buy anymore and made due with what I had. Once the soaps dried, I popped them out of the mold and they were ready for use.


My husband was my guinea pig. He used one for a week in the shower. He said he liked how soft it made his skin and liked the scrubby texture of the loofah. 

I want to grow more loofah this year on a bigger trellis. They were fun to watch grow and attracted lots of friendly bees. 

If you would like to grow loofah this summer, I have a few packs of loofah seeds for sale if you would like to purchase them from my  Etsy shop or contact me via email or contact form. 
The money made from these will go toward my garden fund.

Fruit Coasters

I haven't really be feeling up to par the past few weeks. My Menier's has been at about a level eight. It will literally just wipe me out. I fight it. I still go on my walks and keep doing my normal daily activities except drive. I do not trust myself behind the wheel during my episodes so I get my sweet husband to take me to work. There I struggle to get things done because my concentration level is berserk.
What is Menier's Disease? Check it out HERE.

I have a few Ambassador task to complete with a new company I have been playing with lately. I will share more on this one soon. I feel a little overwhelmed and need to do some thinking.
In the meantime I have done some relaxing and enjoying a little crocheting for my own good. It gives me time to clear my mind. I do a lot of thinking while I crochet.

I made these fruit coasters to add to my Etsy shop. Are they not just the cutest thing ever? They scream summer picnic to me.


They were fun to make and I plan to do other fruits later. My attention span is about that of a two year old. I get bored making the same things over and over so I move on to something else.

Once I shared these cute fruity rounds with my social media followers, someone reached out to me and asked if I could make some Kiwi coasters. "Sure", I said. That was actually in my next plan. I made them using the same pattern as the fruits but the details were just different.


They turned out cute and as soon as I posted them online, they sold. I wasn't even finished writing the description before I heard the "Cha Ching" chime in from the app alerting me that they had just been bought. It was from the lady that had asked me to make them.

HERE is the pattern I used for the coasters if you would like to make some for yourself . If you can't crochet and want a set, I still have the fruity ones listed. I plan to make some pineapple and pear ones soon.


Rag Bunny

I reached up into the closet and pulled down the rag bunny. It always brings back memories.

I remember the days when times were tough and money was more tight than today. I would have considered us poor. We lived in a little old house that used to belong to Nicks grandparents. He and his father did a great job remodeling the inside and we made it our first home. I actually loved that house but hated where it was. It sat on about 10 feet from the road on the corner of a busy intersection. It was not safe to play outside or even enjoy the porch out front. However, there was a lot of love and memories in that house and you could always get a whiff every now and again of his Italian grandmothers cooking through the walls.

We both worked and it took my whole paycheck to pay for daycare and insurance. The only reason I worked at the time was to have insurance. I still can’t say I would have rather been a stay at home mom. I needed an outlet, and my daughter needed to interact with other children. It all worked out. 

Every Easter, I have always created my daughter an Easter basket. When she was little I refused to go out and pay lots of money on the fluffy stuffed animals and throw away toys that we simply could not afford. One year I found a piece of scrap material to line her basket to match her new dress. With enough scrap left over I created a matching bunny. This was my first time doing anything like this but I wanted her to have a rabbit doll. 

I cut out shapes of each limb. By needle and thread, I sewed and stuffed each piece together and attached it all together. It was not perfect or pretty but she was tickled to have a bunny that mommy made. 

The rag bunny is still around. She didn’t take it with her when she moved out. I bring it out every year and add it to my Easter decorations. Sometimes it sits on the bed or in the rocker. Sometimes its added to other decor. This year its sits on my mantel. It brings back memories of her being little and how sometimes the simplest and cheapest gifts can be the best. 


Happy Mail from Cali

My sweet friend Annette is a maker of crafty stuff. She is also another Nutrisystem Ambassador. How cool is that? I love how we can follow and support each other on our weight loss journey and be able to share craft ideas at the same time. You can find her on Instagram under the name "Mexicanstew". Her names comes from her being Mexican and married to a Stewart.
Is that not the cutest thing?
I was thinking, If I created a name like hers it would come out something like "Americandime"

Well, I got my first Happy Mail the other day. When I came in from work there was a package for me sitting on the counter. My husband smiles and says "your popular today". It was from Mexicanstew. I tore into it not knowing what I was going to find, but I knew it was going to be good.


Inside was the most adorable little hand made greeting cards. Now, she had no idea I loved greeting cards, but I do. Especially the ones that are blank inside. I hate shopping for cards in the store and you can't beat a pretty handmade card with a personal hand written note inside.


There was also one of her handmade lotion bars. I will keep this one in my purse. It's good for dry skin and even safe enough to use on your lips. I love lemon smells and it just so happens to be the fragrance of Lemon Grass.


To top it off, she included one of her little draw string bags shes makes.
I have been all over the house thinking of what I can use it for. I will be heading out of town this weekend and will be taking it with me. It could be used for a makeup or a jewelry bag. But I plan to either use it to pack my lingerie in my suitcase or carry a small crochet project in it. decisions, decisions.

You can find items like these in her Etsy shop but you may have to wait until she gets it stocked back up and running.


Handmade With Love From Texas

I have always wanted to make my own soaps. I just never understood the whole concept of buying soap to make soap. I got to thinking about it and thought, “I guess it is the same as buying wax to make candles”.

Every time I go to small shops where handmade soaps are made, I am always drawn over to the rack to admire them and take a sniff. However, I have never purchased any bars of homemade soaps. Never have I even tried a bar of it. I always use liquid soap at home.  

My blogging friend Benita made some goat milk based soap and I was excited when I receive a few of them from her in the mail the other day to try. I immediately opened one to try it out. I was impressed! I loved the smell and silky feel of these little soaps. The light fragrance of honey almond smelled clean and fresh. 


I'm sold! So far I used the soap on my hands and face and love the feeling it gave my skin. I plan to use it in the shower next for an all over feel.
I was amazed at how creamy it felt without making my skin feel oily but yet made it feel hydrated and soft. I accidentally got a little in my eyes and it did not even irritate them like most soaps will.

Would you just look at that lather!


Making soap could be fun as I have read about so many different fragrances and ingredients you can use. Benita has given me the inspiration to try making my own. I’m still not sure I could pull it off as good as hers are. I am doing a loofah garden this year and the loofah sponges will be ready to harvest in the Fall. I think this would make a great combination to homemade soap projects. 


Head over to Benita's blog ,Chasing Quaintness and check it out. She is so talented and her post are fun and interesting. 
She also host link parties you can join in or just look around. 


PS: I think she should really sell these soaps!!

Crochet Halters

Today your getting another crochet post. In case your wondering what I have been working on lately,....Com on, I know you have...

Well, I wanted to make some socks....and I did but, Oh my gawsh! While they are cute, they are not something I enjoy walking around on hardwood floors in. Talk about rough on the feet. I felt like I was turning my heels into waffles.

Needless to say, my crochet socks were a fail. Knitted socks are way more comfortable so if anyone would like to make me a homemade pair I would love you forever.....I'm serious.....I'll send you my mailing info, just ask.

So, I decided to crochet these cute little Simple Summer halter tops.


No, silly, not for me.
At 49 (almost 50) years old, I do not think I can rock a halter top.....Ok maybe I'll try this summer who knows. But for now, I just hope to sell them in my Etsy shop so I can have some beach money.


They are simple to make (says the fiber artist). I found a basic pattern and added a few of my own special touches. I also played around with a different stitch..

I made a granny square halter a while back. It still sits in my shop waiting for an owner. Again, I can't pull the look off, but some cute little beach babe or boho chic could.


I think they all turned out adorable and were fun to make. I would pair them with a pair of shorts or boyfriend jeans.


Handmade halters and more at LiLiDi on Etsy

Distressed shorts- Rue21.
Earrings- Sashka Co.
 Fedora- Ebay

Free Pattern to the Original Simple Summer Halter can be found at


Christmas Goodies

This is the only time of year I will spend hours in the kitchen baking cookies, cakes, candy and fudge.

This is the first year I have made sugar cookies. For some reason I have always felt it was a hard task. (or maybe I thought I might like it). I have put it off long enough. I usually always make pecan butter cookies or Biscotti. Not this year. I tried all new recipes that I have never attempted.

Sorry no photo of the sugar cookies yet because technically it’s only 8:00 in the morning and I haven't made them yet. I wanted to get my post out before I start with all of my Christmas Eve festivities. 

I made a batch of Italian Canestrelli cookies. They turned out delicious! The slight taste of lemon and powder sugar, set these cookies away from the typical butter cookie.
Since I have an Italian husband, It's always fun to throw in a special Italian recipe in the mix.


I'll never be able to compete with my mom or the little Italian grandmother that once held this green handled rolling pin. But its always fun to take a shot at it.


I have been wanting to try out my extra large muffin pan so I made a dozen apple muffins. I did not have any large muffin cup liners so I made my own using parchment paper. They looked like they were right out of the bakery. Dontcha think? I ended up eating one and giving the rest away. I may make some more of these later. My dad has requested some. I can't say no to daddy.


I also made some shortbread cookies. These were the easiest ever! With just three ingredients they turned out great. Perfect with morning coffee. 
Did I say "only three ingredients"?


Then there was the Fudge. I have an easy fudge recipe, but when I saw the award winning peanut butter fudge recipe over at Andrea's blog, I had to give that one a try. I love peanut butter fudge and when she mentioned it could be made in the microwave, I was sold! Mine did not turn out as pretty as hers but it was still delicious! Thanks Andrea.


Today we will make a trip to a few neighbors and hand out boxes of homemade goodies. Later we will head over to mom and dads for some family time with dinner pickups and gifts for the kids. 

Before I close, I want to show you this darling Christmas ball that my favorite friend made me. The movie “Die Hard” is one of my favorite Christmas movies....Ok not really, but it is the most exciting Christmas movie....Ok maybe technically I should call it a Holiday Movie....
Anyway, she made me a Christmas ball that represents one of the main phrases in the movie. You have to see the movie to understand. 


I love it. Thank you Anne!!!


Yall please remember the true meaning of Christmas. 
Jesus is the best gift of all.

I WISH YOU ALL A MERRY CHRISTMAS!!!!

The Poncho

As I keep taking a shot of this whole fashion post thing, I have learned that my yard is not as private as I wish. The other day I peeped around to make sure no neighbors were at home so I could take some photos using my tripod and wireless photo snapper. No one was at home so I ran outside to set up my camera. I turned around after a minute and the teenage neighbor across the street was at the end of his driveway snapping photos of me with his camera (not phone camera, but big camera). I just waved at him since he does not understand English and I ran inside. So that's why most of my photos are taken inside the house with no natural back grounds or lighting. I hate it but, I'm a little bashful doing my own fashion show for the neighborhood.

Now to The Poncho:

When I was younger, my mom made me the most colorful little poncho. It was made for me to wear over my bathing suit.

It was brightly stripped with colors of summer and was always too big. It hung off my shoulders and down to my ankles. I always thought it looked like this.......


 ↓


Ha ha ha- Just kidding...Not really

It was basically a circle of pom pom trimmed terry cloth with a large hole for my head and two small holes for my arms. This was back in the 70’s and I do not remember ever wearing it then, but here it is today.


This poncho has hung in my closet for years. I would look at it and thought I needed a sombrero to wear with it.
I never wanted to get rid of this piece of clothing. There was always something about it that made me want to keep it. 


Maybe it’s the bright colors with the cute pom pom trim.


Maybe it was because it was like a blanket.
Or maybe it was just because my mom made it for me and that's something special.


My daughter would play with this poncho when she was small. She liked to put it on and twirl around while she danced. 

Now when she gets into my closet and sees ‘The Poncho’, she laughs and says “Mom, you still got that thing?"

"Yes, I think I’ll keep it for my grandchildren".