Showing posts with label Crochet. Show all posts

HandMade Greeting Cards

I’m trying my hands at something new. I have recently been creating greeting cards using my crochet art as the main focus. I know cards are becoming a thing of the past, but it is always nice to get a little happy card in the mailbox.

I currently have a few listed in my shop. I want to see how it goes before I create too many. It was not as easy as I had expected. I thought I could simply stamp a few words on a card and run with it. Instead, I struggled with every letter to get them straight. I might have even said a bad word.


I learned that stamping was not meant for lefties. You have to work left to right as you line up each letter with the one before. Well, unless I go backwards, I have to stamp right handed. The struggle is real. It was fun for me though. I think with practice, Ill get better.
I admire anyone that can stamp in a straight line. Just how do you do it? 

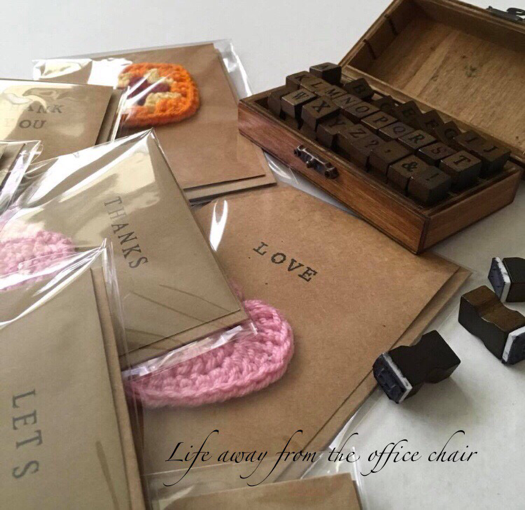
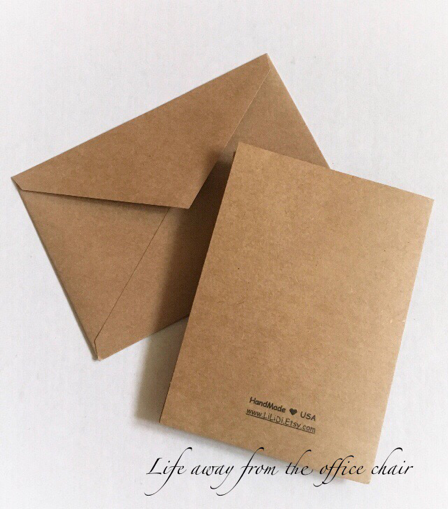
Anyway, I left my cards as they turned out. They each have their own character. No two are alike. Some of them took several tries just to get them half way readable. The imperfections add a unique style along with the carefully crocheted tiny motifs that adorn them. I even have my little shop signature on the back of them. Just Hallmark! 


I actually sold one on the same day I posted it. This made me happy. I rely on my buyers, readers and friends to help spread the word. No pun intended.  

Below are examples of some of my greeting cards. You can find more by clicking HERE.
Be sure to look at my other things while your there. 


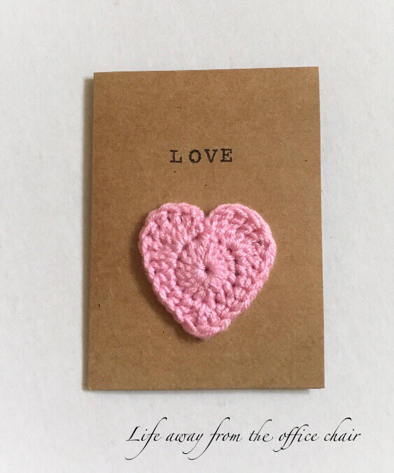
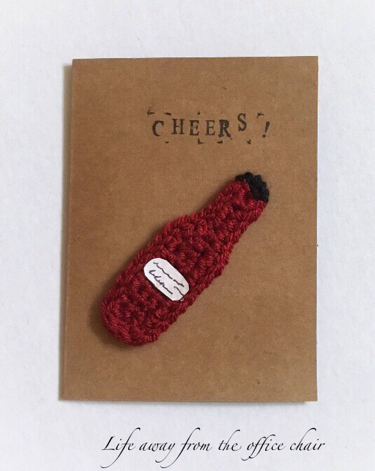
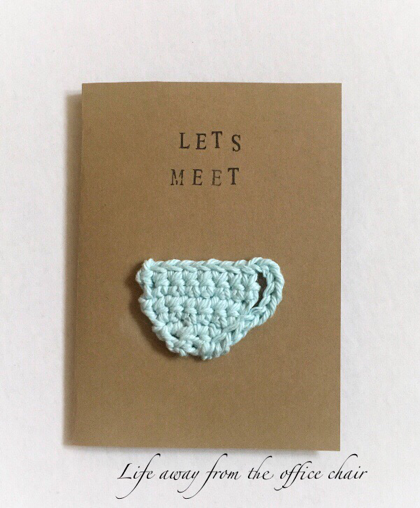
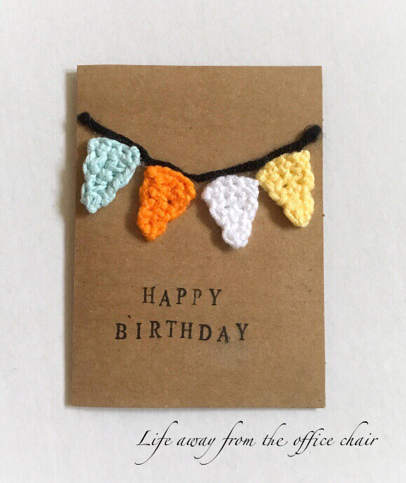
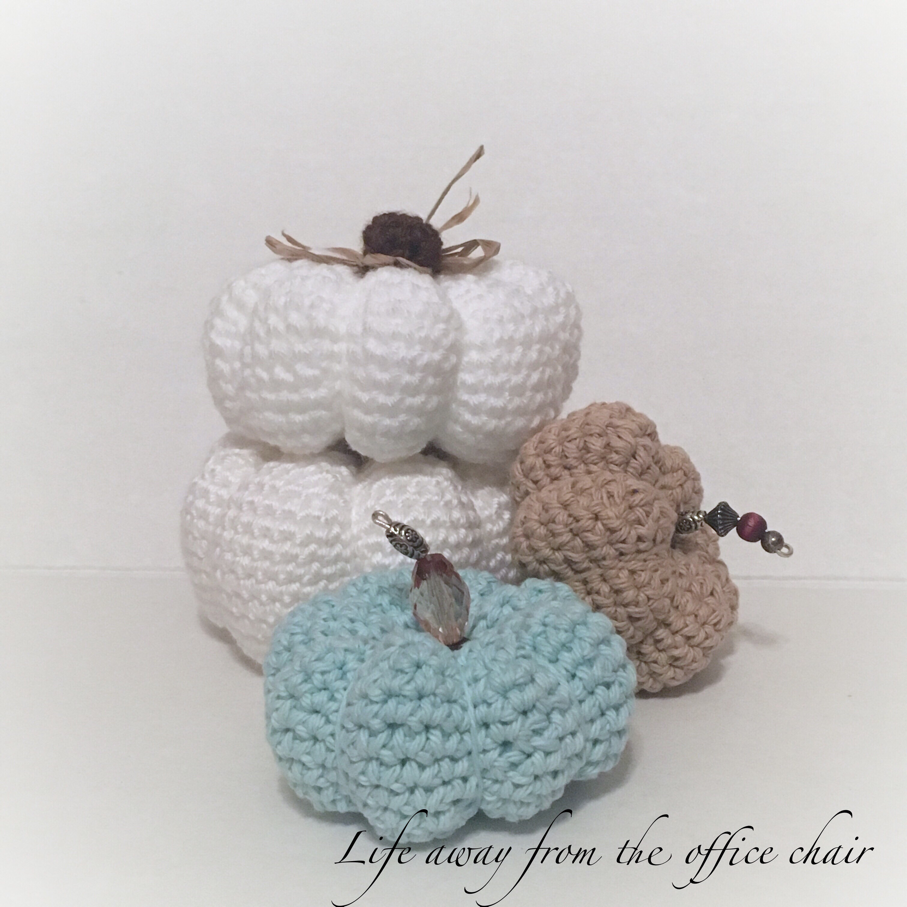
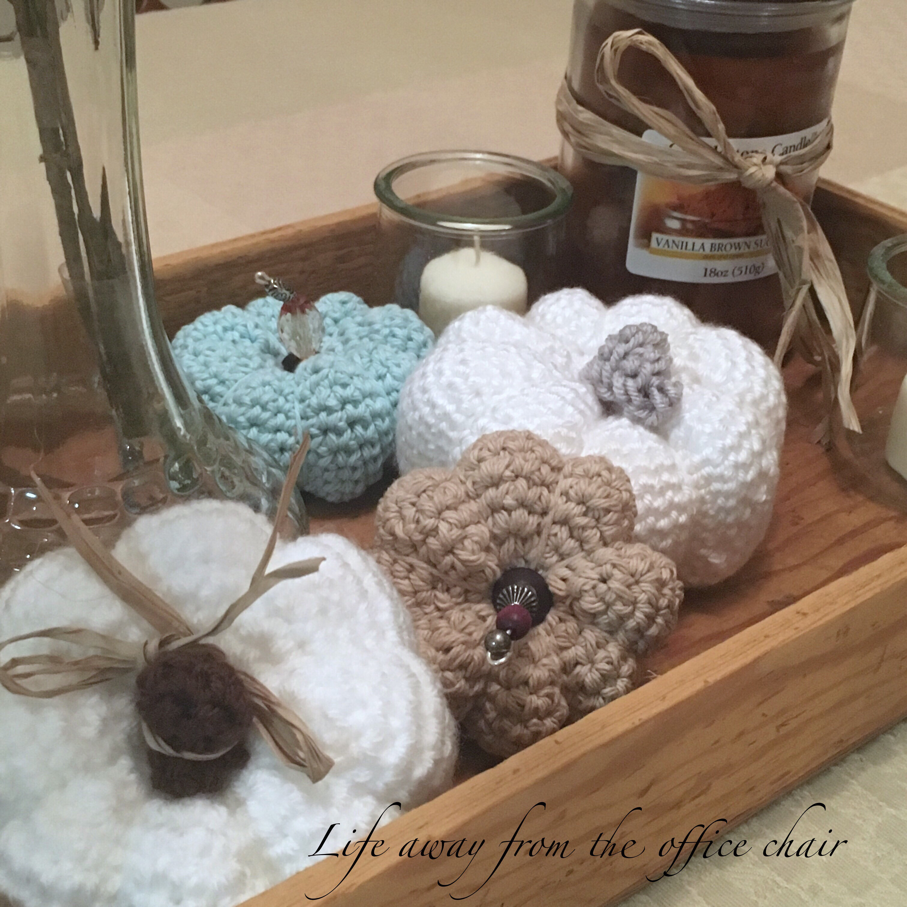
Arn’t they just so darn cute? 
I plan to make a few more with different sayings. You can help me out with ideas if you wish.

Do you have a reason to send a card?  If so, please purchase one from my shop. I could use the Christmas money. I'm not begging am I?

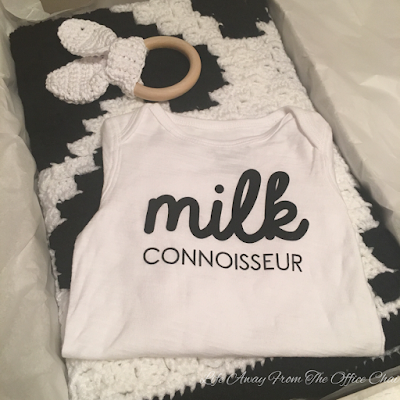
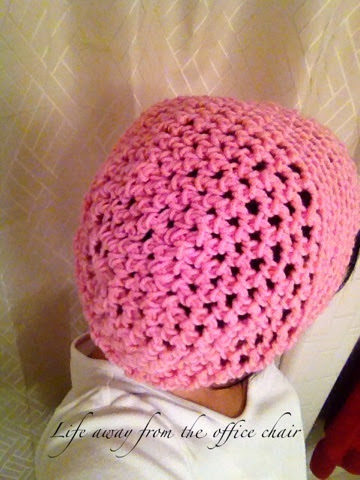
Now, I am currently crocheting a baby hat and diaper set by request for my baby nephew due in December. 
I also have an order for ten of my mug cozies to create.  This will keep me busy for a day or two as I'll be stamping in between.

Cow Baby Blanket

I'm excited to announce that I get to be a great aunt in December to a little boy.

My Nephew and his wife have been married for two years now and decided to add a baby in the mix. Baby Colton is suppose to arrive on Christmas Eve according to the due date given by the doctor. 

They held a baby shower at her parents home. It was a fun drop in to shower. The theme she chose for her nursery was farm animals. This fits them perfect. They are about as country as you can get. the mom works for an equine vetenary. It's not odd to see her tending to a cow or horse weather it be a calm petting or helping one give birth. 

Putting all of this in perspective, I found it fitting to make baby Colton something farm related. I recently learned to crochet a corner to corner stitch and wanted to create a blanket for the new baby. 

I made one with a “cow” print. 


I like how it turned out but wish I had made it a little larger. This one measures about 30x30. It will make a great lap or stroller blanket. With the nursery theme, it will look good draped over the crib as well. Ok, really, I'm just in love with the "black and white" of it all. 
This was the only crochet blanket I saw in all of her gifts. It was a party hit. 

It was crazy in the making. I had yarn everywhere as I had to keep starting a new color. I got tangled several times. I had no clue what I was doing or what I had gotten myself into. 


It finally worked itself out. It was an absolute challenge. 


This is another one of those things I probably would never make again.

I added some extra things to go with the blanket.
I found a cute onesie and loved how well it paired with the cow blanket.
I also added one of my crocheted wooded baby teethers. You can find more of these in my Etsy shop if you want a natural handmade teether. 


The shower was nice. There were lots of goodies and cake to snack on along with lots of fun and laughter with family and friends.
I look forward to meeting my new Nephew. I hope he comes before Christmas so we will have a new baby around at Christmas gatherings.
The wait is on.


The pattern I used for the blanket was actually a pattern for a dishcloth. You can find it HERE
Using the same graph, the corner to corner stitch multiplied it by 4 then I added a few extra rows in the center to make it at least 30x30. 


Crochet Fairy Pumpkins

My plan this season, is to decorate using only things I made added to some old stuff I already had. Blaah! I may toss the old stuff to the road after this year. I hate the smell of old fake floral when it ages. Being in the attic all summer, this is exactly what happens. Now, I know why people burn lots of fragrant candles during the holidays. Ya think?

I have a slew of remnant pieces of yarn left over from other projects. The pieces are too small to make anything useful so I decided to make some tiny pumpkins to use in my Fall decorations. Cute huh?


They call these fairy pumpkins because of the size and the wonky little stems. Sort of  like the ones you see in fairytales. 


I was inspired by THIS PATTERN found at "A Time for all seasons" blog. 
I adusted the rounds a bit to create different sizes and used my own imagination on the stems. 


They were so fun and quick to make that I had to stop myself before they ended up all over the house. 

Meanwhile, I have had some request from family and friends asking me to make them a couple of these cuties, so back to my yarn stash for more pumpkin making. This will be fun to do while I enjoy some Hallmark movies in my recliner. 


Crocheting Halters

It has really been beautiful here in the Carolina's the past couple weeks. The weather has been warm souring into the 80s. Me and Nick have been able to get in some nice long walks and the flip flops and tank tops have come alive in my wardrobe. 

But there has been a couple cool or rainy days where all I want to do is curl up in my recliner and crochet. I found a new pattern for a granny square so I made a couple signature halter tops. 


First let me show you this little baby shower gift I made for a church friend. I crocheted a little bonnet and booties that can be used to bring baby home from the hospital, pictures or church. 


These little crochet items are often never used and just put away as a heirloom. Regardless of what she decides to do with this set, I had fun creating it. 

Now about the halters. I couldn't hardly wait to show you. Though they are unique, they are not really my style, so you probably will not see me sporting one of these. I made my daughter a white one last year that is similar to these and she wears it well. I think they are rather cute and if I was in my 20's again, I'd attempt the look. 


I can't make two the same as I just add the colors as I go. I will start each square with a color and just add fill in colors as I go.

I call it the boho or hippie look. I'm sure there is someone out there that would love to have one of these. It seems to be the new (but old) trend this summer. "Whats old is new again" they say. 


I can see these halters being worn with cut off jeans and sandals. They are cool and perfect for the beach.
I had fun making these and plan to do some more on my spare time. 

I have also been having fun creating dish cloths and baby rompers. Im telling ya, my creation ideas are all over the place. I may crochet a trivet on day and a pair booties the next. I never know what direction the hook is going to go. I like trying to make new things and have come a long way on learning to crochet. I surprise myself sometimes.

Halters above can be found in my online store Here

Crochet Nunchucks

I had the strangest request from a customer the other day. She is a photographer and asked if I could make her a set of crochet nunchucks for a photo shoot. A little surprised, I told her I'd take a stab at it (no pun intended). I didn't even need to find a pattern to make me a set of these. After I looked at a few online, I figured it out.


They were pretty simple to make. The hardest part was making them exactly the same on each side. I'd loose count and have to start over. That happens when I watch Law and order and try to crochet at the same time.

I do not plan to make anymore of these  but I will share my pattern with you.

Crochet Nunchucks.
This is will be crocheted in rounds (no joining). you may need a stitch marker.
I used a hook size I (5.0mm)
Make two.

1st Color
Round 1: Start with a magic circle (or chain 3 and join in 1st chain to create a circle).
6sc in the circle. (6).
Round 2: 2sc in each sc (12).
Round 3: *2sc in next, 1sc in next* repeat around (18)
Round 4:  Back loops only,  sc around (18) (this makes your bottom edge of handles)
Round 5: sc around (18)
Round 6: sc around (18)
Round 7: sc around (18)
2nd Color
Round 8-27 sc around (18)
1st Color
Round 28: sc around (18)
Round 29: sc around (18)
Round 30: sc around (18)
Time to add the stuffing!!!
Round 31: back loops only, *2sc together, 1sc* around.
Round 32: *2sc together* around.
Fasten off leaving enough yarn tail to stitch the center hole together.

Chain
I did four I-cords about 5 inches long, sewed and linked them together, then sewed them to the handles. Here is a link on how to crochet an I-cord.

I'm not good at writing out patterns, but I hope you get the idea. Basically I did 5 rounds of end colors and 20 rounds of center color.


I think they turned out really cute and I may crochet another pair one day just for the fun of it but currently I have other projects I need to be working on.

Funny Fact about me: I really do know a couple tricks with real nunchucks.

"I guess you can now call me a "Crochet Ninja"
 I've shared this at:

Textured Dish Cloths

I love to crochet. At the end of the day, when work is over, dinner is ate, our walk is walked and the dishes are done, I will curl up in my chair and crochet while I watch TV. This usually does not happen until after nine. Then we go to bed around 11:30. I find It relaxing and it helps with my nervous hands. Yes, since my daughter has left the nest, I stay worried and nervous. Its better sometimes than others but I'm learning to deal with it. They say you will worry about your kids until they are 90. I believe it.

Speaking of dishes, I have gotten on a little kick of making dish clothes. Made with 100% cotton, these little scrubbers are perfect for all kinds of clean ups. They have just enough texture to clean up any mess.


I'm not sure what the stitch pattern is called but its my favorite. I also make coffee cozies using the same stitch. I think everyone should be able to enjoy these so if you know how to crochet, you can use my pattern. If you do not know how to crochet and would love to have a some of these, you can purchase them from my Etsy shop. I can make them in almost any color you wish.


I tweak it just a bit to make dish cloths in a way that I do not need to add a trim stitch around at the end. The way I do the last stitch makes a nice clean edge with a simple scallop.


So grab your needle and lets get started.
This is a simple pattern that consist of single crochet and double crochet.
Perfect for beginners.

I used:
Size I crochet hook.
Peaches & Cream cotton yarn (I found some at WalMart and Hobby Lobby.

Instructions:
chain 30
Row 1: sc,dc in 2nd stitch from hook, skip next chain, *sc,dc in next chain, skip next chain* across.
sc in the last stitch (of each row) ch1 turn.


Row 2: dc in same space as sc (from the end of row one), skip next space, *sc, dc in next , skip next * across. sc in the last stitch (of each row) ch1 turn.
Repeat Row 2 until you have a square.
Finish off and weave ends.

You can add a single crochet around the entire dish cloth before you finish off if you wish, but not necessary.

Ive shared this at:
what-are-you-doing-blog-hop at contentemeant
thursday-favorite-things-blog-hop at katherinescorner
submarine-sunday at usscrafty
cooking-crafting-with-j-j-link-up at julieslifestyle


Crochet Gaiter

It has been so cold the past couple days here in North Carolina. Our average temperature in the Winter is in the 40's. This week however, It's been in the teens! That's just too cold for me. I want to crawl under blankets and hibernate!

My Husband walks every morning around the neighborhood. This is what he does for daily exercise. If its raining, he will stay in and take a break. No matter how cold it is he will just bundle himself up and go.
He likes to wear a beanie on his head and something around his neck but hates long scarfs, they get in the way. He wanted something he could wear around his neck in a manly fashion and be able to pull it up over his face to protect it from wind when needed.

So, I made him a Gaiter. AKA neck warmer.

The first one I made him, I crocheted using a half double rib stitch. After wearing it and washing it a few times, it became big. It just kept growing. I even took out some inches but it continued to grow.

I wanted to make him another one but using a more durable stitch that want stretch out too much. I found this pattern for a cable stitch. It was the easiest one I found so far. I even made the hat for my friend.


I used gray because black over the face would make him look like a robber. ha ha.
OK, and it matches his gray coat. He wore it today and said it did great keeping his face, neck and ears warm. I actually thought it looked really good around his neck like a snug cowl to wear out somewhere.


Ive shared this at:
oombawkadesigncrochet
cityofcreativedreams
pamspartyandpracticaltips
create-with-joy
dwellings-theheartofyourhome
thestitchinmommy
katherinescorner
craftsalamode

Finger Crocheted Beanie

Hope everyone had a wonderful Christmas! I did!
My favorite part was after the presents are all wrapped and all the cooking was finished, I'd curl up in my chair with a ball of yarn and watch Hallmark Christmas movies.

I have a few projects by request I could have been working on but I do not have the yarn colors handy and no way was I going fight the traffic to get some. They will have to wait a few days.

That left me itching to make something. I didn't know what to make so I just grabbed a ball of yarn I had on hand and began fidgeting with it. I have seen where crafters will crochet with fingers and knit with arms but they all say you have to use bulky yarn. My yarn was not bulky, but I attempted it anyway.


With just my fingers and and idea, I created a this cute summer beanie. "I bet bulky yarn doesn't say summer like my plain ol four ply worsted yarn" . Mine turned out soft and loose and worked up just fine.


Finger Crocheted Beanie
This is crocheted in the round, not joining at beginning stitch so grab a stitch marker.

Make a magic circle
Row 1: sc 10 into the circle (10)
Row 2: 2sc in each sc around (20)
Row 3: sc in next, 2sc in next, cont. around (30)
Row 4: sc in each sc around (30)
Repeat Row 4 approx 24 more times (depending how slouchy you want it).
(my last few rows, I did tighter so it would create a band but this is not necessary)
Tie off and weave ends.


It was a little tricky during the first couple rounds but got alot easier as I went.
Now that I have the feel for it. I may create a couple more.
I have a pair of pink glasses that match this color and I looked like a total geek, but that's ok. It was just to get picture, which is hard to do by myself. Ha.

I'm going to say it again, "Perfect for summer" with its light weight and airy feel.

And speaking of summer, I can hardly wait!!!!


Ive shared this at:
cityofcreativedreams
amaze-me-monday at dwellings-theheartofyourhome
snickerdoodle-sunday at 2crochethooks

Crochet Pet Leg Warmers

It all started when my sister texted me a photo of her dog wearing a pair of baby socks. She thought it was so funny. In return, I sent her a picture of a funny dog wearing a pair of knitted leg warmers.

After we both had a chuckle, she asked if I could crochet her dog a pair of leg warmers. "I suppose I could", I said. She gave me the approximate size of her dogs legs and I told her I'd see what I could do.

Before I knew it, I had created a pair of leg warmers. I laughed at them for a minute because I think its rather silly how people dress their pets, but Im pretty sure I'd do the same thing if I had one . All I have is a fish and I'd make him something if he'd wear it but he would just get it wet and then it would be ruined....Ok that wasn't funny but, I do love my pet.

She asked me to make her four but most pet leg warmers are just worn on the front legs because the back legs are so curvy and used for ear scratching and such.

I liked the way they turned out. Here is her Shiz Tzu modeling the pair I made for her. I think she likes them.
 

They were so fun to make that I made a pair or two for my shop. If you cant crochet and would like a pair, just let visit my Etsy shop and let me know what color and size. If you can crochet and would like to make a pair for yourself, then im sharing my pattern for you today.


DOG LEG WARMERS
(Make 2)
chain 4
Row 1: sc in 2nd ch from hook, sc next 2 (3), ch1 turn
Row 2: sc across (back loop only) (3) ch 1 turn.
Row 3-11: repeat row 2, ch 1 turn
Row 12: repeat row 2, ch 1 but don't turn.
Row 13: sc each stitch down the ribbed band. (12) ch 3 turn.
Row 14: dc in each sc (12) ch 3 turn.
Row 15-18: Repeat row 14. Finish off at end of this row and leave enough yarn to seam together.

Seam the legwarmer together and turn right side out.
That's it.
You can make them as long and wide as you need by adding more or less stitches to the ribbing and length.

You are welcome to sale what you make with my pattern but please link back to my post. Please do not sale my pattern. Id also love to read any comments from those who tried my pattern out.

I've shared this at:
inspire-me-monday at create-with-joy
tuesday-pin-spiration-link-party at thestitchinmommy
judyscardmakingandpapercrafts
link-and-share-wednesday at oombawkadesigncrochet

Zig Zag Cowl

Finally got around to making "Me" something. I made a zig zag cowl neck warmer and im excited about it. I wonder if it will get cool enough around here in North Carolina to ever get to wear it?


I have been practicing making some zig zag, rippled or chevron crochet (psst, check out the chevron mug cozy in my shop ← (I actually created the pattern for this cozy myself).
In the process of learning, I created this cowl neck warmer. I love the colors.  I think I will make a matching hat and then Ill be set.

You can find the free pattern for this cowl here.
If you want the pattern for the cozy, leave your email in comments or something and Ill be glad to send it to you.

It took me a couple hours on and off for about three days to make it. It did not turn out as pretty as the one that inspired me. I have always struggled making zig zag stitches as well as granny squares, but that's another post, another day.

This pattern was pretty easy, however, as I was on the last row, I realized I was doing all wrong. Silly me was using half double crochet instead of double crochet. No idea what I was thinking. It caused the cowl to be little wonky but it will work for me.


I plan to make a couple more of these lovely scarves "the right way". I think I may have the hang of it now but didn't realize all the different ways you can create a stitch like this.  geez!


I think it goes with one of my new sweaters....ok, in an odd way. What do you think?


Ive shared this at:
city-of-links at cityofcreativedreams
thursday-favorite-things-blog-hop at katherinescorner
dare-to-share at pamspartyandpracticaltips
snickerdoodle-sunday 2crochethooks
inspire-me-monday at create-with-joy.com
Amaze-Me-Monday at dwellings-theheartofyourhome


Chocolate Dipped Bacon Brittle

Had ya at bacon didn't I?

While on the computer the other day I came across an awsome looking recipe for candied bacon dipped in chocolate. Now, anyone that knows me, knows my love for bacon. I literally buy 2 packs a week. 

Anyway, I was fixing to head to bed and call it a day when this idea hit me. Why not make brittle with bacon instead of nuts? I thought I had come up with something new and could not wait to experiment.

The next day I headed back to the computer and to my disappointment, it seemed that I along with a hundred other people have already come up with this idea. They must have read my mind during the night.

 
Get a glass bowl ready, this is made in the microwave. I tried it once in a plastic bowl and it ruined both the bowl and sugar. It was just nasty. So Make sure you have a GLASS bowl.

1 cup sugar
1/2 cup light syrup (karo)
1/4 Tbs salt
1 Tbs butter
1 tsp vanilla
1/4 tsp baking soda
Bacon crumbles

Combine sugar, syrup and salt.
Microwave 4 minutes (be careful it will be hot and bubbly).
Stir in butter, bacon and vanilla and cook another 4 minutes.
Stir in baking soda an pour quickly onto a greased cookie sheet. Cool approx 20 minutes then break into pieces.
Once completely cool, dip each piece into melted chocolate and lay on wax paper to dry. Sprinkle with sea salt. Enjoy.


Oh. So you like the mug cozy I made too? I just got an order in of these adorable birch buttons from Wearhouse Industries. They were special made for me. Thanks Randy and Laura! I love how they look on these cute crocheted warmers. I sale these mug cozies in my Etsy shop if you want one. I can do all colors.


Ive shared this at:
link-and-share-wednesday at oombawkadesigncrochet
full-plate-thursday at mizhelenscountrycottage
thursday-favorite-things-blog-hop at katherinescorner
submarine-sunday at usscrafty 
inspire-me-monday at create-with-joy
monday-handmade-linkup at judyscardmakingandpapercrafts
something-fabulous-wednesday at roubinek  

Drawstring Beanie

I recently took a couple weeks off from crocheting. I have been suffering from Tennis Elbow something terrible and thought that crocheting could have been causing the pain. I'm not going to rule it out just yet, but It didn't help relieve it by not crocheting, so here I am, right back at it.

I made a couple things for a friends baby and then I made a couple of these cute little drawstring beanies to put in my shop. I fiddled and faddled until I come up with what I believe is now my favorite creation.


The neat thing about this cute little beanie is that it doubles as a neck warmer by just undoing the drawstring. I actually think I will make one for myself. But first I am going to share my pattern for all of you that like to crochet.


You are welcome to use my pattern and sell what you make with it. I just ask if you will link it back to me when you do so I can get credit for the pattern. But please do not sell my pattern. :(

Draw String Beanie:
H Hook (my favorite)
ch= chain
sc= single crochet
dc= double crochet

Ribbed Band
chain 10
Row 1: sc first chain from hook, across. (9) ch 1 turn.
Row 2: sc back loop only across. (9) ch 1 turn.
Repeat: sc back loop only across, ch 1 turn until you have enough to fit around the head.
Form a ring: sc two ends together. -Now your band is made.
no need to ch1. just begin crocheting the beanie in rounds ( you may need a stich marker). I used the tail of the beginning chain to mark my beginning of each row.

Beanie
Row 1: sc around once
Remaining Rows: sc, dc next stitch, skip next stitch, sc, dc next (repeat round and round to desired depth hat needs to be. finish off.

Draw String
ch 100, cut yarn and tie knot in each end.
weave in and out of last row of stitches.
There you have it!

You can alter the size by using less rows and stitches or different size crochet hooks.
You know what else is fun about this pattern? You can use any of your favorite stitches to create any texture you like best.

If you can't crochet and want one of these cute bundle of stitches, just visit my shop to see if any are available. If not, I'll be glad to make one up for ya.


Ive shared this at:
inspire-me-monday at create-with-joy 
amaze-me-monday at dwellings-theheartofyourhome
tuesday-pin-spiration-link-party at oombawkadesigncrochet 
tuesday-pin-spiration at thestitchinmommy
something-fabulous-wednesday at roubinek
link-and-share-wednesday at oombawkadesigncrochet
worthwhile-wednesdays at craftyallieblog
off-the-hook-monday at littlemonkeyscrochet
thursday-favorite-things-blog-hop at katherinescorner

Crochet Cleaning Pad

Somewhere between resting after a days work, watching tv and looking over at the dirty dishes in the sink, I decided to make a dish sponge to try.


Its not limp like the dish rags I have made even though they are still wonderful too, this cleaning pad is just the right size to fit in my hand and since its double layered,  its sturdy and gets the job done. One side is bumpy for scrubbing and the other is smooth for wiping.
 

I used 100% cotton yarn. Cotton yarn is what I use for household items because its absorbent and washes up really well in the wash. And frankly, I like the natural, soft and clean feel of cotton.


You can make these any size you want but here is how I made mine.

I used an H hook and cotton yarn.
Special stitch is the popcorn stitch also known as the bobble stitch. Click here to learn how to make this special stitch.

Chain 15
Row 1: Starting in the next chain from hook, sc across (14), ch 1 turn.
Row 2: sc across (14)
Row 3: sc, sc, bobble stitch, sc ,sc, bobble (repeat to end), ch 1 turn
Row 4: sc across (this is the back side of a cloth or inside of the pad), ch1 turn.
Row 5-10: repeat row 3 and 4
Row 11: sc across, ch1 turn
Row 12-24:  repeat row 11
To finish off: fold in half and sc together all the way around,(including the fold side). making 2 sc in the corners.
sl stitch to beginning and tie off ends.

I have not tested the pattern since I typed it out, so let me know if it does not work for you. If it does work for you, id love to see your finished project.

This cleaning pad can be used on many different things around the house. The possibilities are useful anywhere.


Ive shared this at:
dare-to-share at pamspartyandpracticaltips
anything-goes-linky at bacontimewiththehungryhypo
submarine-sunday at usscrafty
monday-handmade-linkup-party at judyscardmakingandpapercrafts
inspire-me-monday at create-with-joy
amaze-me-monday at dwellings-theheartofyourhome
worthwhile-wednesdays at thecraftiestallie

Crochet Stork Pouch

Its been over a week since my last post. I have just been busy. Since my last post, I took another trip to the beach. It was so nice. I can just never get enough of that place. Then there were some Fathers Day plans that kept me busy and I also had some special crochet orders to fill.

I have a customer that keeps my creativity going with her special request. I have made things I never thought about making and frankly, some things she asks me to make, I freak out a little inside because I'm not sure I can do it. Somehow, I usually pull it off. There are a few things I have not been able to do for her because of a special stitch I have never learned. Most patterns or videos I find are right handed and I'm left handed so therefore, I have to work backwards and in opposite directions and there are just some stitches or items I can not do backwards.
For example: Slippers I make have to be one way, not a left or a right. I know, its crazy but its me.

Ok, enough about that.

One thing I was asked to make was a cocoon for a baby photo prop. Also known as a stork pouch. They are so darn cute. You can search "Crochet stork pouch" and so many photo shots of how they are used will pop up. They are darling.

It looked easy enough so I attempted it.
The first one I did was really bad. It looked like a rag. It was lopsided, tiny and crocheted too tight. But, that was just my trial one and it gave me an easier idea for the right thing.

My second attempt was a win.


Im pleased with the way the it turned out and hope she sends me photo of it with a tiny newborn balled up inside.


Most photographers do not actually hang these with the baby inside them unless it hammocks the baby really well without tipping it out. They will lay the baby down and photo shop to make it look like its hanging or hang the baby while holding a grip to the baby and then photo shop.

Im thinking about making a couple more of these to sell in my Etsy shop soon. I need to find more of this soft stretchy yarn before I do so.


Ive shared this at:
made-by-me-131-linky-party at jaqsstudio
something-fabulous-wednesday at roubinek
worthwhile-wednesdays at thecraftiestallie
cityofcreativedreams
snickerdoodle-sunday-with-barb-from-alifeinbalance at 2crochethooks
amaze-me-monday at dwellings-theheartofyourhome
monday-handmade-linkup-party at judyscardmakingandpapercrafts  
inspire-me-monday at create-with-joy
what-are-you-doing-wednesday at contentemeant (featured)
link-party-51 at oombawkadesigncrochet.

Baby Shower Show Off

I'm excited to say I get to be an Aunt again to a baby boy. I can not wait for him to get here in July. I think the older I get, the more excited I get when a baby comes into the family.

The last baby born in the family was about 3 years ago, and since then, Ive been enjoying crochet more, so this poor child is gonna be covered in crochet....Literally because as soon as I heard the news, I began to crochet him a blanket. Its a rather small blanket, perfect for a cradle, lap or stroller.


She is doing his nursery in "Elephant on Parade" so I tried to match the colors accordingly. I then ordered a darling little wooden teether to match.


I ordered if from littlethingsboutique on Etsy. You should definitely check out some of her creations. They are so darn cute!

I didn't stop there. Since most of the family are Tarheel fans, I decided to make him a hat and booties for game days.


And since his father takes interest in reptiles, I made this adorable little set for fun.


Maybe it will be good for a daddy and son day out.


Last but not least, I made him this elegant looking little newsboy hat set.


The shower went well and everything she got was so cute. However, the cake is always my favorite part of a shower. She did cake pops instead. They were so sweet! My favorite was the grape salad and pecan pie bites. Here is the recipe to the same grape salad I made over a year ago.


Everything was done up so nicely by a few terrific host.

Now Ill rest my wrist from crochet while I await for the little one to arrive. He is due around the 11th of July. I may have to be on stand by for something red, white, and blue in case he decides to come on or before Independence day!

We are all excited as we wait on his debut!


Ive shared this at:
judyscardmakingandpapercrafts monday-handmade-linkup
made-by-me-129-linky-party-and-features at jaqsstudio
what-are-you-doing-wednesday at contentemeant.