Tipping

We got word the other day to be prepared to see gratuity added on your bill at all area restaurants at the beach. This is something new they are doing weather you have a party of two or a party of too many. You will see 20% added. 
They are doing this in hopes to keep their help. I am not totally on board with this idea. 


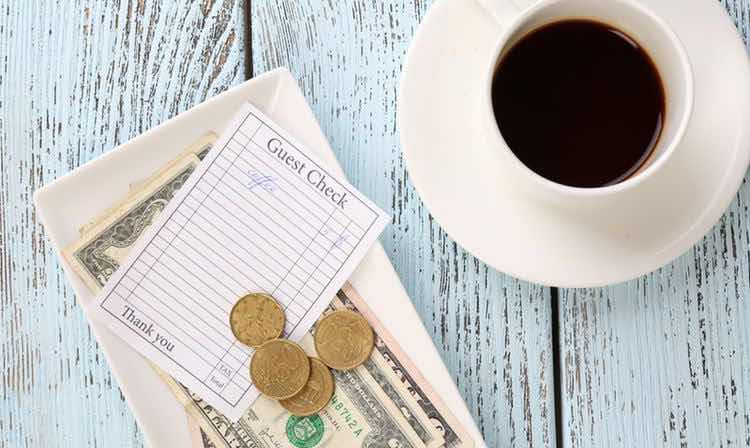
I have to say, “we are good tippers”. If you have ever worked in restaurant you know how important it is to get a tip. Most waitress make a small amount from the business and rely on tips to make up their wages. We always leave a generous amount no matter how well we liked or disliked our meal. It is not the waitresses fault if you do not like what you ordered. 

I know people that will go into a cheap restaurant and expect royal treatment from the waitress and only leave a dollar to no tip. 

But…..

I am against the idea of restaurants adding 20% gratuity to everyones bill. I think it should be up to the customer to tip out of generosity. Sure some will only leave some change but others will leave a healthy tip. It’s part of the job. It’s what the waitress signs up for. They have good days and bad days. I think service is important and feel like waitresses will not give good service knowing they will get a tip anyway. This will also eventually lead to waitresses trying to “up the sale” to make their tip bigger. 

We do not leave extra tip if we see it added to our bill and they would get more from us out of the gracious of our heart than if they add 20% to our bill. 

I will also tip the server when I pick up a take out order. They still have to prepare the order, bag it up, add the condiments and make sure the order is right and the customer is happy. 

I will only add change to tip jars on a counter. I am not big on tip jars. I have seen businesses hand money from the tip jar to beggars or take out extra change when they are shorted. While I think that is sweet, those tips are distriubted between the workers at the end of the day. I want to know my tip will go to the servers and cooks, not drunk Joe down the road. 

And I do not tip at fast food restaurants. They get paid a fair hourly pay and, well, fast food workers know tips are not expected when they sign up but then of course, I never really thought about it. 

How do you feel?

Do you always tip? 
Do you tip on take out orders?
How do you feel about adding gratuity on everyone?

Feedburner- Making The Switch

If you are a blogger, you may have already heard that as of July 1st, Feed burner will no longer work. 
Honestly, I didn’t even know what Feed Burner was. (Still don’t).

If you have the widget that says
 “follow me by email” or  “Subscribe by email”. 
It will no longer work unless you get a new platform. 

What does this mean? It means readers that have subscribed to follow your blog via email will no longer get updates on new post and new readers will not be able to opt in to get your new post via email. 

I started getting worried and didn’t want to lose my followers. I want to get the full benefits to my knowledge on my blog. 
So I contacted my Fairy Blogmother also know as Linda of Life and Linda


She has been transferring bloggers old feedburners over to Mail Chimp. This is the best way to go and Linda knows all about web design and what's best for everyone. 

For a small affordable fee, she patiently walked me through what I needed to do on my end to get things ready for the transfer.
I had to make an account on Mail Chimp which was an easy task then I went to my feed burner and downloaded my email followers. This was easy too, and wow, I did not know that many people were subscribed to my blog. I was tickled over this. 
She has a blog post HERE explaining it better than I can.

I gave her permission to administer my blog and she did all the hard work and now I have a nice new widget on my side bar. There is nothing else I need to do. My subscribers will continue getting post emails and new readers can subscribe to get an email every time I post a new blog post.  

If you are reading this from an email right now, 
you may not see the side bar on my blog page. 
To see this, just click on the blog title.

My side bar includes some other small things to read, advertisements, announcements, follow options
and even a tip jar if you’re feeling generous. Haha. 

Will you be making the switch? Let Linda know and she will have you fixed up in minutes. 


Coconut Pound Cake

I hope all you Fathers out there had a wonderful Fathers Day yesterday. Nick had to work but afterwards he was honored with a cake and a few gifts from the daughter. We let him nap all afternoon. We honored the fathers at church during the morning service and took the dads out for dinner that evening. It was a great day.

Now to the coconut cake. 
My daughter came home Friday night to aggravate spend time with her dad all weekend. They are always picking and playing. She likes to bake with me so I decide to make a coconut pound cake after seeing the recipe online. I did not plan to eat all of it so I gave half to my daddy. He loves any kind of sweet stuff. 


I love how it turned out and it was fairly easy to make. When I cook, I can make the biggest mess and it usually takes me more time cleaning up than actually making it. So if you saw my kitchen, you would think I struggled. It only took about 5 minutes to put it together and 65 minutes to bake. It had a light taste that was not too sweet. I think it tasted more like some sort of bread than a cake. It went great with a cup of coffee and only lasted 2 days. 

I let my daughter make the frosting. It was delicious and added just the right amount of sweetness. 


COCONUT POUND CAKE
  • 2 cups- all purpose flour
  • 1 1/2 tsp- baking powder
  • 1/2 tsp- salt
  • (You can use self rising flour and eliminate the salt and baking powder).
  • 3/4 cup- butter (room temp)
  • 1 cup- sugar
  • 1/2 tsp- vanilla extract
  • 1/2 tsp- coconut extract
  • 3 eggs
  • 1 cup coconut milk (or coconut cream)
  • 1 1/4 cup sweetened coconut
Whisk the flour, baking powder and salt together. In another bowl, use a hand or stand mixer and cream the butter, sugar, vanilla extract and coconut extract together. 
Add in the eggs one at a time then gradually add in the dry ingredients while alternating with the coconut milk. 
Fold in the coconut then pour into a prepared loaf pan. (Lined with parchment paper or well greased).

Bake 350 for 60-65 minutes. Test it with a toothpick or cake tester for doneness.

*FROSTING
  • 4 tablespoons- butter (room temperature)
  • 2 cups- confectioners sugar
  • 2 tablespoons coconut extract
  • 1/4 cup- toasted coconut
Mix together the wet ingredients then gradually add in the powder sugar. 

*You can also add coconut extract to store bought vanilla or cream cheese frosting. 

Vintage Nesting Bowls

I had a great weekend. It has been a while since I had a weekend off. Nick had to work so I had most of the weekend to myself. 
It was nice getting up in the morning, having my cup of coffee (or three) and not worry about having to put on make up and dress clothes. It was also the perfect time to meet up with my parents for brunch. They call it breakfast but since they eat their first meal around 11:00 am, I call it brunch. I met them at a diner in town and enjoyed some bacon, eggs and grits. 

After brunch I went down to their house for a little visit. They are still unpacking and sorting through boxes since their recent move in last month. 
I noticed some cute little nesting bowls. I vaguely remember mom using these bowls as I was growing up. I always admired them. She said she was planning on throwing them in the trash because they were cracked and useless. I grabbed them up and said, I’ll make use of them somehow. The large one could still be used as a fruit bowl or I can use the bowls for planters. I would not cook with them anymore or eat from them because of the cracks. They are old. 


These are made by Watt Pottery. I always thought the pattern was a cherry but it’s actually their most popular print of an apple. 
The Watt company started in 1922 but did not start marking them until the 1940’s. They have the marking of  “Ovenware Made in the USA”. Some also had a number on the bottom stating the size of the bowl. 


1949 is when they started hand painting them with a simple county design. This was to make production run faster. 
The apple print was the 2nd print made in 1951. They produced it for a year until the next design. 
From 1949-1953 was the busiest time for Watt Pottery. Patterns produced during this time are the most popular. They made more than just bowls such as pitchers, butter dishes, S&P shakers, etc. 
The factory burned down in 1965 making Watt Pottery even more popular as no more were made. There have been “fake” replicas made but they are recognized by mis-markings, colors and quality. 


Doing the math- These bowls are 70 years old. Wow. 

Do you have any vintage finds that you have decided to keep? 

Tried Something New

We were able to get a couple days off work last week so we made a four day weekend. Of course we headed down to our camper at the beach. 
Our four hour drive was a wet one. We drove through rain 90 percent of the way. Once we got to our camper, it was cloudy but no rain. 
We unpacked the car and I made the beds and set up the inside of the camper while Nick hooked everything up on the outside. It takes us about 45 minutes to get settled in.

I clicked on the campground app and seen where they now have paddle boats, kayaks and paddle board rentals on Saturday. 
I got all giddy because I have always wanted to try stand up paddle boarding. He was not happy about it. He said, “I do not think it’s a good idea. You can’t swim”. I was not worried because I knew they would make me wear a life jacket. “What if you fall off?” He questioned. “I will just get back on”. I was determined to do it. I like adventure and trying new things. The fear of getting old and not being able to do things bother me.

The lake at the campground will sometimes have an alligator visit. It is also full of fish, turtles, and families of ducks. 
But this was my chance. We walked to the kayak shack as soon as it opened and they helped me to a life vest and a paddle board. 
I told them I have never done it before, so they suggested I start out on my knees and when I feel comfortable, I can stand up. I slipped off my shoes and got onto the board. With a tiny push, I was in the deep waters of the lake. 
(Note: the alligator was in the lake just last week but I did not know that until a friend told me later that she saw him).


It was not a wide paddle board as I expected. I tried several times to stand up but I was afraid I would loose my balance so I headed back to the shore so I could bottom it out and stand up. Another little push and I was back out on the water. 


This time I was standing. My legs were shaking and I was a little wobbly, but I was paddle boarding for the first time and I was so excited. Nick took videos and snap shots of my little adventure. He was so afraid for me. He was relieved when I told him I was finished. I only stayed out for about 20 minutes. It felt like I got a nice little workout. My legs got tired easily and I didn’t want to be dinner for the alligator. 

Afterwards, we ate lunch and headed out to the beach. It was cloudy and raining most of the time with little peeks of sunshine. We enjoyed our stay regardless of the weather. But don’t ask Nick. On our last day, He had to tear down the camper so it could go back into storage. It was pouring rain and he was drenched. Here is a picture of him standing on the picnic table trying not to get wet but he finally gave up. We had to be out by noon. 


Now Back to work.

Keto Crackers

I am not on a Keto diet. I do not think it is a healthy diet to stick too but I do like to make some Keto dishes because I am trying to stay away from breads. One of my favorite is the Chaffles I shared in another blog post. I also made flourless Bagels and Cauliflower bread sticks before. 

Today, I want to share with you these delicious Keto Crackers made with only two ingredients. 


➞2 Cups Almond flour
➞1 Egg
➞ Spices (optional)
Place it all in a food processor until the dough is formed. 
(Mine looked like little beads until I kneaded it in my hands).
Put the dough between two pieces of wax paper and roll very thin. 


Cut into squares or rounds (any shape of choice) and place on a parchment lined cookie sheet 
and bake 350 for about 10 minutes. 
Keep an eye on them. Once the edges start browning, they are done. 
(You can also poke holes in them to give them a different look)

Some of mine were thinner than others and those browned quicker. 

These crackers are sort of bland so you may want to add salt or seasoning of your choice. I added “everything bagel” seasoning and they were delicious/  
If you leave them plain, you will think your eating those nasty communion wafers served at what us Baptist call “The Lords Supper”. 


My husband took one then asked where the wine was. Ha ha. 
He was just kidding because mine were full of flavor from my added spices and would be great served with a veggie dip or cheeseball. 
They didn’t last long.

These would also be great served on a Charcuterie board which I would love to do one day.